From Oil to Heat Pump: One Portland Family's Switch
Editor's note (March 2026): Project costs and rebate amounts in this case study reflect a typical project scope at the time of writing. Current pricing and rebate amounts may differ. Rebate amounts are income-dependent. See current rebates.
The call came in the way most of them do. Dan and Liz, a couple in Portland's Woodfords Corner neighborhood, wanted to talk about heat pumps. Their oil boiler was aging, their heating bills were climbing, and a neighbor had recently made the switch.
"We were spending about $3,800 a year on oil," Dan told us. "That was with the thermostat set to 66 during the day and 60 at night. The bedrooms upstairs were cold no matter what. We'd been thinking about heat pumps for a couple of years but didn't know where to start."
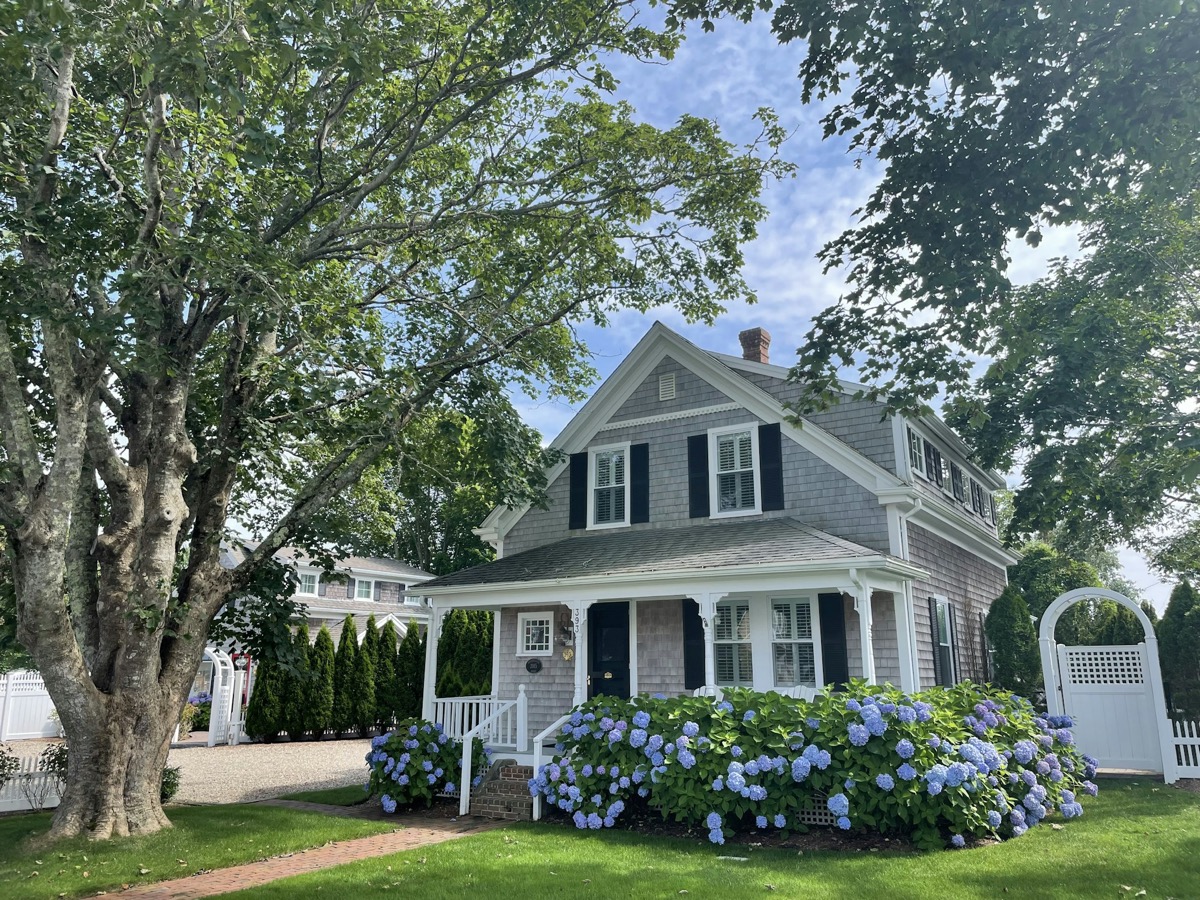
Their home is a 1960s Cape Cod, about 1,600 square feet, with an oil-fired boiler feeding baseboard radiators. It's a house we've seen dozens of times in Portland: solid bones, good neighborhood, and an envelope that was letting heat escape through every gap and thin spot in the attic and basement.
The Assessment: Starting with the Envelope
When our energy advisor visited for a free energy assessment, Dan and Liz expected to spend most of the time talking about heat pump models and placement. Instead, the conversation started in the attic.
That's the whole-home approach. Before sizing a heating system, you need to understand the building envelope. A tight, well-insulated home needs a smaller system, runs more efficiently, and delivers better comfort. Skipping the envelope work is one of the most common mistakes we see when homeowners go straight to equipment.
Here is what the assessment found:
- Attic insulation: About five inches of old fiberglass batts with gaps and compressed sections. Nowhere close to the R-50 target for Maine attic retrofits.
- Attic air leaks: Open penetrations around wiring, plumbing stacks, and the attic hatch. Warm air was flowing freely from the living space into the attic.
- Knee walls: The short walls where the second-floor rooms meet the roofline were poorly insulated. Cold attic air was circulating behind and above the knee walls, surrounding the bedrooms with unconditioned space.
- Basement rim joists: Completely uninsulated. You could feel cold air coming in.
- Windows and doors: Original, single-pane storms. Drafty, but the air sealing issues in the attic were a bigger factor than the windows themselves.
"I thought we just needed heat pumps," Liz said. "I didn't realize how much heat we were losing through the attic. It made sense once the advisor explained it - why pay to heat the house if half the heat is going straight out the top?"
Phase 1: Air Sealing and Insulation
We started where every whole-home project starts: sealing the air leaks and adding insulation. This phase took about four days of on-site work.
Air Sealing
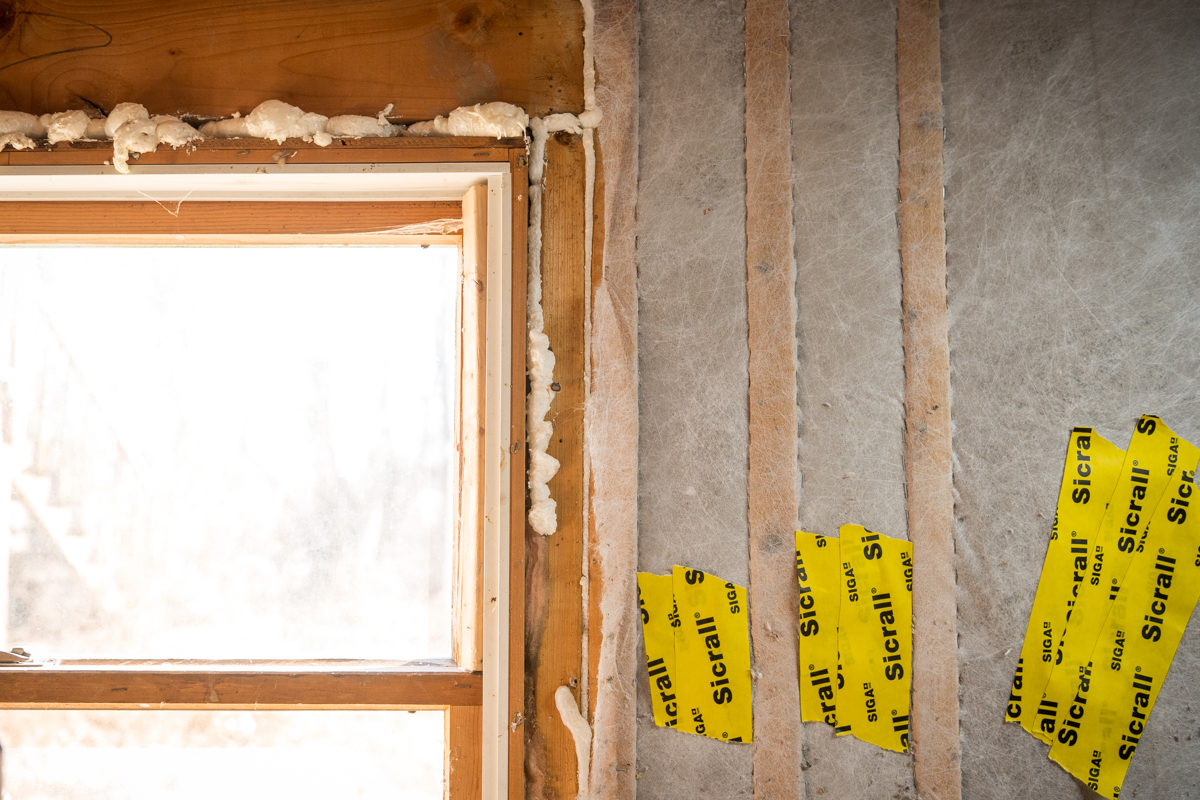
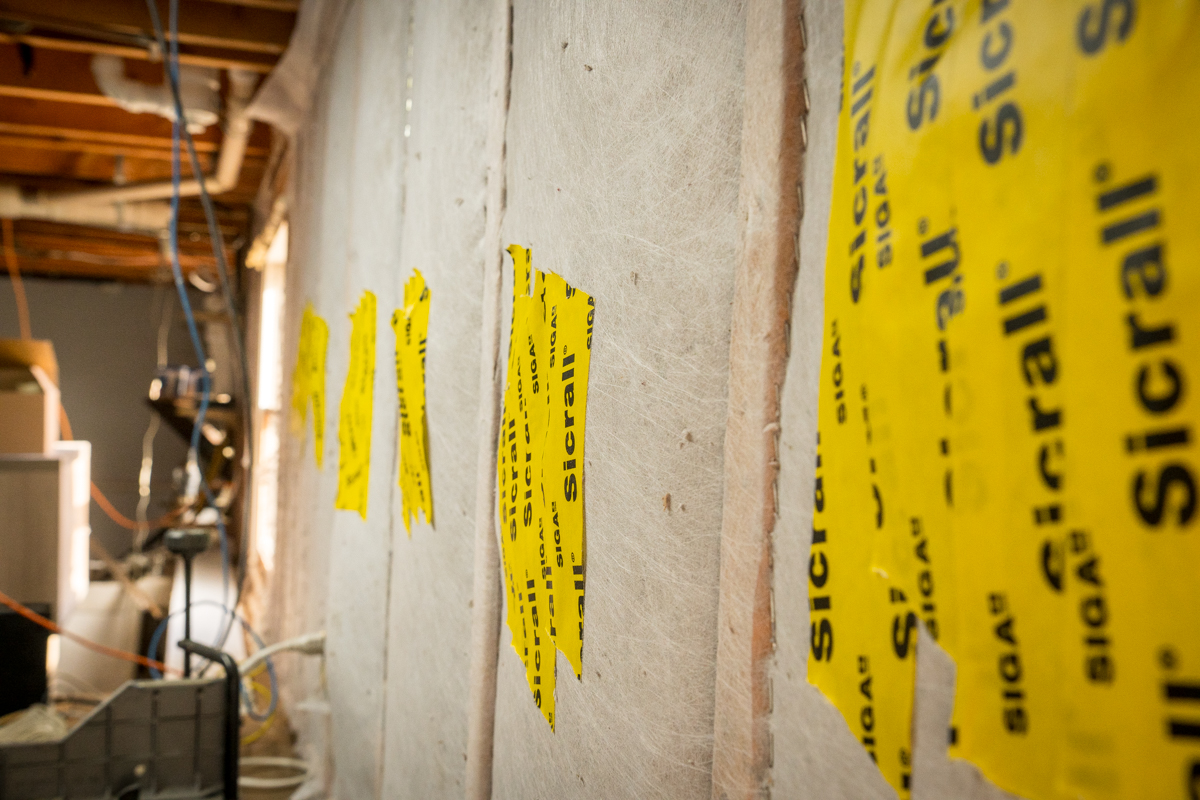
Our crew sealed every penetration through the attic floor - wiring holes, plumbing stacks, the attic hatch, tops of interior partition walls, and gaps around recessed light housings. We also sealed the basement rim joist area with two-part foam and rigid board.
Air sealing is the step that most contractors skip, and it's the step that makes the biggest difference in comfort and energy performance. Insulation slows heat transfer, but it does not stop air movement. Without sealing the gaps first, warm air flows right through the insulation.
Insulation
With the air barrier in place, we insulated using blown-in cellulose:
- Attic floor: Brought up to R-50 (about 14 inches of dense-pack cellulose)
- Knee wall areas: Insulated at the roofline to bring the knee wall space inside the building envelope
- Enclosed sloped ceilings: Filled the rafter bays between the knee walls and the flat ceiling
- Basement rim joists: Polyiso rigid foam plus cellulose
We use blown-in cellulose as our primary insulation material because it fills irregular cavities better than batts, resists air movement, and delivers consistent performance for decades. It's made from 85% recycled newspaper with a Class 1 fire rating.
Wondering what your home needs? Every home is different. Schedule a free energy assessment and we will walk through your home from attic to basement, identify the highest-impact improvements, and give you clear pricing with rebate estimates.
Phase 2: Cold-Climate Heat Pumps
With the envelope addressed, we sized the heat pump system for the home's reduced heating load. This is where the insulate-first approach pays off. Before the envelope work, the home would have needed a larger system to keep up on cold nights. After air sealing and insulation, two heads were sufficient.
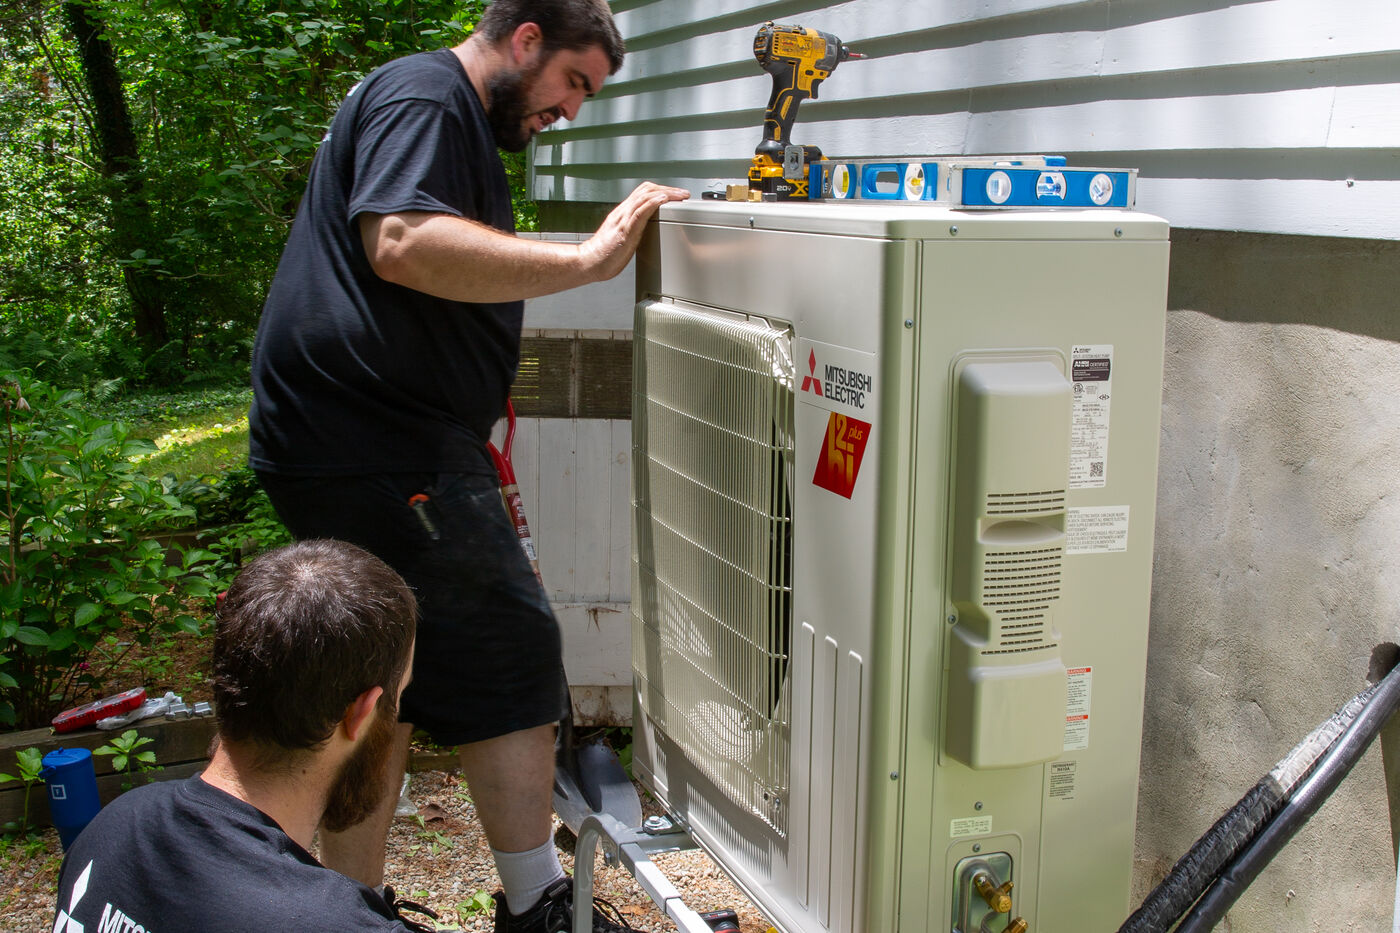
We installed a Mitsubishi multi-zone system with two indoor wall-mounted heads:
- First floor: One head in the main living area, supplementing the existing baseboard radiators
- Second floor: One head in the upstairs hallway, serving both bedrooms
These are cold-climate heat pumps rated for operation down to -15F, which is critical for Maine winters. Standard heat pumps lose capacity in extreme cold, but cold-climate units maintain their output when you need it most.
The outdoor unit was placed on the north side of the house, on a wall-mounted bracket to keep it above snow accumulation. Installation took one day.
How the System Works Together
The heat pumps handle the majority of heating from October through April. On the coldest nights, typically below 5F, the existing boiler kicks in to supplement. This hybrid approach gives Dan and Liz the efficiency of heat pumps for 80-90% of the heating season with the security of a backup system for extreme conditions.
In summer, the heat pumps provide air conditioning, something the home never had before.
The Numbers: Before and After
Dan and Liz tracked their energy costs carefully through the first full winter after the project:
Metric | Before | After |
Annual Heating Fuel (oil) | ~$3,800/year | ~$600/year (backup only) |
Annual Heat Pump Electricity | $0 | ~$1,100/year |
Total Annual Heating Cost | ~$3,800 | ~$1,700 |
Estimated Annual Savings | ~$2,100/year |
Second Floor Comfort | 5-8F colder than first floor | Within 2-3F |
Summer Cooling | None (fans only) | Central cooling via heat pumps |
The savings fell within the range we typically see for this type of project. Many homeowners with similar homes and heating profiles see 20-40% reductions in total heating costs after weatherization and a heat pump installation.
The Investment and Rebates
Here is how the project costs broke down:
Phase | Cost | Rebates | Net Cost |
Air Sealing + Insulation | ~$10,000 | ~$4,000 | ~$6,000 |
Cold-Climate Heat Pumps (2 heads) | ~$11,000 | ~$4,000 | ~$7,000 |
Total | ~$21,000 | ~$8,000 | ~$13,000 |
Efficiency Maine rebates covered a significant portion of both phases. Rebate amounts depend on household income — the full income tier breakdown and qualifying amounts are on our Efficiency Maine rebates page. They also took advantage of Efficiency Maine Green Bank financing at 0% APR, which spread the net cost over five years.
At $2,100 per year in estimated savings, the simple payback period is about six years. The comfort improvement - consistent temperatures upstairs, no more cold bedrooms, and summer cooling - started immediately.
What Made This Project Work
Three things made the difference in this project:
1. Starting with the envelope. If Dan and Liz had installed heat pumps without addressing the insulation and air sealing first, the system would have been oversized, worked harder, and delivered less comfort. The insulate-first approach meant we could install a smaller, more efficient system that performs better.
2. Keeping the boiler as backup. Going 100% heat pump in Maine is possible, but it requires a larger system and a different approach to ductwork or head placement. For this home, keeping the existing boiler as backup for extreme cold was the most cost-effective path. It also gave them confidence during the transition.
3. Doing it all with one contractor. Because Horizon Homes handles both weatherization and heat pump installation, we could plan the entire project as a single scope. The insulation crew and the heat pump crew coordinated the work, and Dan and Liz had one point of contact throughout.
Does This Sound Like Your Situation?
If you're heating with oil in a 1950s-1970s Cape Cod, Colonial, or Ranch in Greater Portland, there's a good chance your home has the same set of issues this one did: thin or missing attic insulation, air leaks through the attic floor, and an oversized heating system burning more fuel than necessary.
The path from oil to heat pump doesn't have to be complicated, but it works best when you start with the building envelope. That's what we do at Horizon Homes, and we've been doing it across southern Maine since 2006. We're an Efficiency Maine Top-Rated Vendor for 10+ years.
Ready to Find Out What Your Home Needs?
Call Horizon Homes at (207) 221-3221 or schedule a free energy assessment online. We'll walk through your home, identify the highest-impact improvements, and give you a clear plan with costs and rebate estimates. No pressure, no obligation.
We serve Portland, South Portland, Westbrook, Scarborough, Falmouth, Cape Elizabeth, and surrounding communities.
Note: This case study is based on a composite of real projects completed by Horizon Homes in the Greater Portland area. Specific details have been adjusted to represent a typical project. Results vary by home, energy prices, and usage patterns.
Find our guides faster: add Horizon Homes as a preferred source on Google.
Free Home Energy Assessment
Want Results Like These in Your Home?
Every home is different, but the approach is the same. We start with a free walkthrough to identify what will make the biggest difference.
- Free walkthrough, no equipment, no disruption
- Rebates up to $18,100 identified for you
- Written improvement plan with pricing
Schedule Your Free Assessment
We call within 1 business day.