Attic Insulation Gone Wrong: 5 Mistakes in Maine Homes
We climbed into an attic in Gorham last week and found twelve inches of insulation sitting on top of wide-open gaps around every can light, plumbing stack, and wire chase. The insulation looked great. It was doing almost nothing.
Attic insulation is one of the most common home improvements in Maine, and one of the most commonly botched. We have been in hundreds of attics across Greater Portland over the past 20 years, and the same mistakes show up again and again. Here are the five we see most often.
1. Insulating Without Air Sealing First
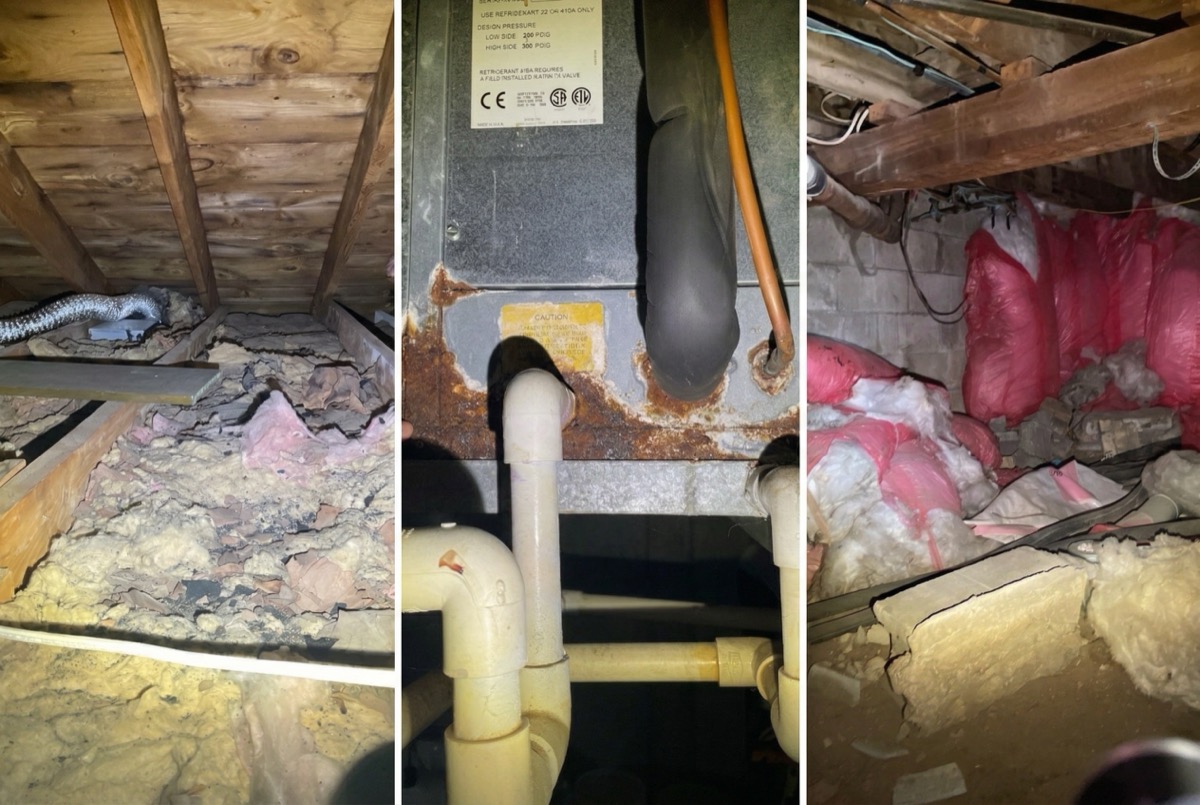
This is the biggest one. Insulation slows heat transfer through conduction, but it does very little to stop air movement. If there are gaps, cracks, and open holes in your attic floor, warm air from the living space below will rise right through the insulation.
Common air leakage paths we find in Maine attics:
- Recessed can lights with open tops that act like chimneys
- Plumbing vent stacks passing through unsealed holes in the attic floor
- Electrical wire penetrations at every junction box and switch
- The attic hatch or pull-down stair with no weatherstripping or insulation
- Top plates of interior walls that are open to the attic
- Chimney chases with gaps between the framing and masonry
A home with good insulation and poor air sealing can lose 30 to 40 percent of its heating energy through the attic. The warm air carries moisture with it, which can cause condensation, frost, and eventually mold on the underside of the roof sheathing.
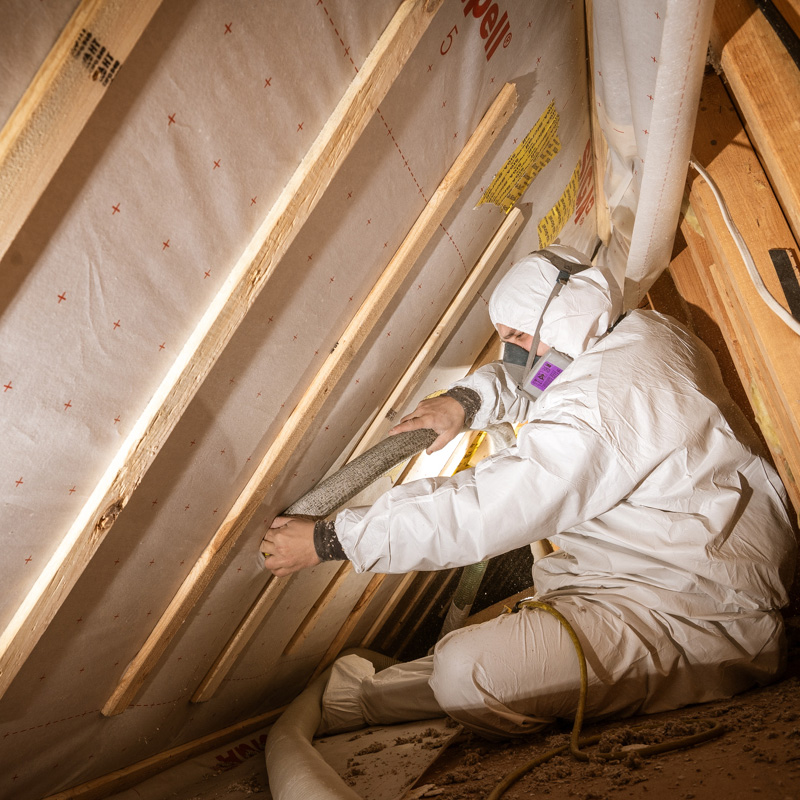
Proper attic work means air sealing every penetration before adding a single inch of insulation. We use expanding foam, caulk, metal flashing, and rigid barriers depending on the size and type of gap. Then we insulate on top of a sealed surface.
2. Compressed or Undersized Batts
Fiberglass batts are designed to work at a specific thickness. An R-19 batt needs to be 6.25 inches thick to deliver its rated R-value. Stuff that same batt into a 4-inch cavity and the R-value drops. Stack heavy boxes on top of batt insulation in the attic and you compress it further.
We regularly find attics where:
- R-19 batts were installed in spaces that needed R-50
- Batts were compressed by storage boxes, plywood walkways, or HVAC equipment
- Batts were cut poorly, leaving gaps at joists and around obstacles
- Multiple layers of batts were stacked but shifted over time, leaving bare spots
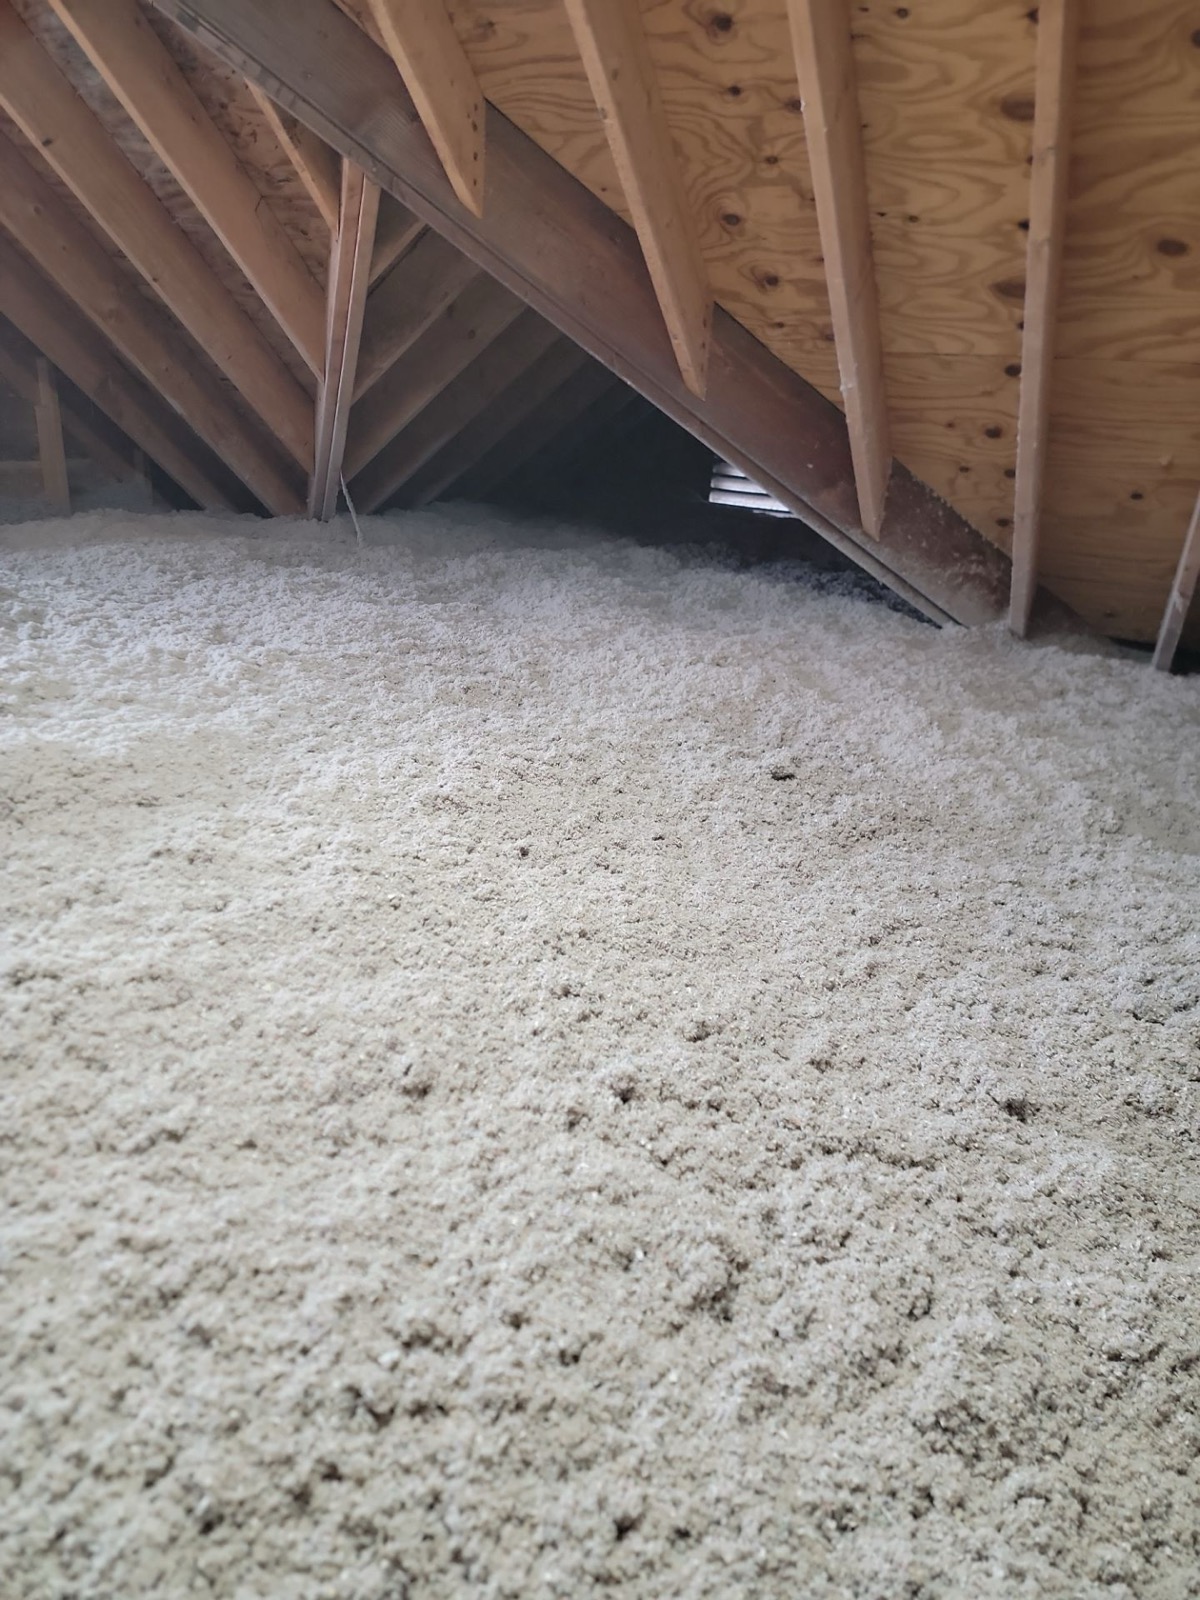
This is one reason we use blown-in cellulose for attic retrofits. Cellulose fills every gap and contour, does not compress under its own weight, and can be installed to a consistent depth across the entire attic floor. For Maine homes, we install to R-50, which means about 15 to 16 inches of blown cellulose.
Schedule a free energy assessment and we will check your attic insulation depth, coverage, and condition.
3. Blocking Soffit Vents
Your attic needs ventilation. Cold air enters through soffit vents along the eaves, rises through the attic space, and exits through ridge vents or gable vents at the top. This airflow keeps the roof deck cold in winter (preventing ice dams) and removes moisture year-round.
When insulation is blown or pushed too close to the eaves, it blocks the soffit vents. We see this in probably a third of the attics we enter. The insulation migrates toward the edges over time, or the installer did not use baffles to keep the soffit channel open.
The fix is installing ventilation baffles (sometimes called rafter vents or chutes) in every rafter bay at the eave before insulating. These rigid or foam channels keep a clear air path from the soffit to the attic while allowing insulation to extend all the way to the exterior wall top plate.
Without baffles, you get a double penalty: poor insulation at the eaves (the coldest spot) and blocked ventilation that leads to moisture buildup and ice dams.
4. Ignoring the Attic Hatch
The attic access hatch or pull-down stair is often the single biggest hole in the attic floor, and it is almost always left uninsulated and unsealed. A standard pull-down stair has gaps around the frame on all four sides. On a cold night, you can feel warm air pouring through it from below.
Fixing the hatch is straightforward:
- Weatherstrip the frame so the hatch or door seals when closed
- Attach rigid foam insulation to the back of the hatch (matching the depth of surrounding attic insulation)
- For pull-down stairs, build or buy an insulated cover box that sits on top of the opening
This is a small fix that makes an outsized difference. We have measured temperature changes of 5 to 8 degrees in the room below the hatch just from sealing and insulating it properly.
5. Insulating the Wrong Surface
In homes with finished attic spaces, bedrooms, home offices, or bonus rooms built into the attic, we sometimes find insulation in the wrong place. The most common version: insulation on the attic floor in areas where the attic is living space, and insulation on the roof line in areas where the attic is unconditioned. The thermal boundary is inconsistent, and heat escapes through the gaps between the two.
The rule is simple: the insulation follows the thermal envelope. If the attic is living space, the insulation goes in the roof line and knee walls, with careful attention to air sealing at every transition. If the attic is unconditioned, the insulation goes on the attic floor.
Where we see the worst problems is in Cape Cod style homes, which are everywhere in Greater Portland. The attic has a finished center section with knee wall storage spaces on either side. These knee wall areas are often uninsulated on the back side, turning them into semi-outdoor spaces that bleed heat from the conditioned rooms they border.
Capes are some of the trickiest homes to insulate well, and some of the most rewarding when done right. A properly insulated Cape with sealed knee walls, insulated roof slopes, and a tight attic hatch can feel like a different house.
How to Check Your Attic
You do not need special equipment to spot these problems. If you can safely access your attic, look for:
- Bare spots where you can see the drywall or plywood below
- Black staining on insulation (a sign of air movement carrying dust through the material)
- Frost or moisture on the underside of the roof sheathing
- Insulation pushed against the eaves with no visible gap for airflow
- Obvious gaps around pipes, wires, and light fixtures
If you see any of these, your attic insulation is underperforming. The good news is that attic air sealing and re-insulation is one of the highest-return energy improvements you can make. Most homeowners feel the difference within days.
Get Your Attic Right
Attic insulation is not complicated, but it does need to be done in the right order and with attention to detail. If your home was built before 2000, there is a good chance your attic has at least one of these five problems.
Schedule your free energy assessment and we will look at your attic, identify what needs fixing, and give you a clear plan for getting it right. Or call us at (207) 221-3221.
Find our guides faster: add Horizon Homes as a preferred source on Google.
Free Home Energy Assessment
Wondering Where Your Home Is Losing Heat?
We walk through your home, identify insulation gaps and air leaks, and give you a prioritized plan with pricing and Efficiency Maine rebates.
- Free walkthrough, no equipment, no disruption
- Rebates up to $18,100 identified for you
- Written improvement plan with pricing
Schedule Your Free Assessment
We call within 1 business day.