Exterior Wall Insulation for Maine Homes
Put your hand flat against an exterior wall surface on a 20-degree day. If it feels like touching a window, your wall cavities are likely empty. We see this on nearly every pre-1960 home we assess in Greater Portland. The walls were framed, sheathed, sided, and plastered with nothing in the cavities. Every exterior wall becomes a direct thermal bridge between your heated living space and the Maine winter outside. Oil bills north of $4,000 a year are common in these homes.
This guide covers how we insulate exterior walls in Maine homes, from the assessment through the finished product, using a method that does not require removing your interior walls or exterior siding.
Why Wall Insulation Gets Overlooked
Most homeowners start with the attic when they think about insulation, and that instinct is correct - the attic is the single highest-impact area. But walls account for 20-35% of a home's total heat loss, and in homes with empty or under-insulated wall cavities, that number can be even higher.
The reason walls get overlooked is access. Attics are open. Basements are accessible. But walls are closed on both sides - drywall or plaster on the inside, sheathing and siding on the outside. To many homeowners, insulating walls sounds like a renovation project involving tearing out drywall, stuffing batts into cavities, and putting everything back together. That perception keeps people from addressing a major source of energy loss.
The reality is different. Dense-pack cellulose insulation is installed through small holes that are drilled from the exterior, filled, and plugged. No interior disruption. No drywall removal. No painting. The process has been refined over decades and is the standard approach for retrofit wall insulation across New England.
Step 1: Assess the Wall Assembly
Every wall insulation project starts with understanding what is inside the wall. Maine homes span a wide range of construction eras and methods, and the wall assembly dictates the approach.
Construction era matters. Homes built before the 1940's typically have plaster and lath on the interior, board sheathing on the exterior, and clapboard or wood shingle siding. Homes from the 1950's through 1970's often have similar exterior assemblies but with drywall replacing plaster. Homes from the 1980's onward are more likely to have some insulation already present - often fiberglass batts - and plywood or OSB sheathing.
What we check:
- Wall cavity depth (typically 3.5 inches in 2x4 framing, 5.5 inches in 2x6)
- Existing insulation type and condition (empty, partial fiberglass, old cellulose)
- Interior wall finish (plaster vs. drywall - affects drilling approach)
- Exterior siding type (clapboard, vinyl, shingle - determines where we drill)
- Presence of vapor barriers or housewrap
- Any blocking or fire stops within the cavity that could prevent fill
- Knob-and-tube wiring (requires electrician involvement if active)
We use a combination of visual inspection, test holes, and occasionally thermal imaging to map the wall assembly before committing to an approach.
Step 2: Plan the Drilling Pattern
Dense-pack cellulose is installed through holes drilled in a systematic pattern that ensures every cavity section gets filled completely. The standard approach for Maine homes:
Exterior drilling (most common). We drill through the exterior siding and sheathing into each stud bay. For clapboard siding, we typically remove a course of clapboard, drill through the sheathing, fill the cavity, plug the holes, and replace the clapboard. For vinyl siding, we unlock and remove individual pieces, drill through the sheathing, fill, plug, and snap the vinyl back in place.
Hole size and spacing. Standard holes are 2 to 2.5 inches in diameter. In a single-story wall with no mid-height blocking, one hole near the top of each stud bay is sufficient - the fill tube reaches down to the bottom and fills upward. In two-story homes or walls with mid-height fire stops, we drill two holes per bay - one above and one below the blocking.
Interior drilling (when necessary). If the exterior siding cannot be removed without damage (brick, stone, stucco), we drill from the interior through the drywall or plaster. The holes are patched afterward with drywall compound. This approach works but requires more finish work and cleanup.
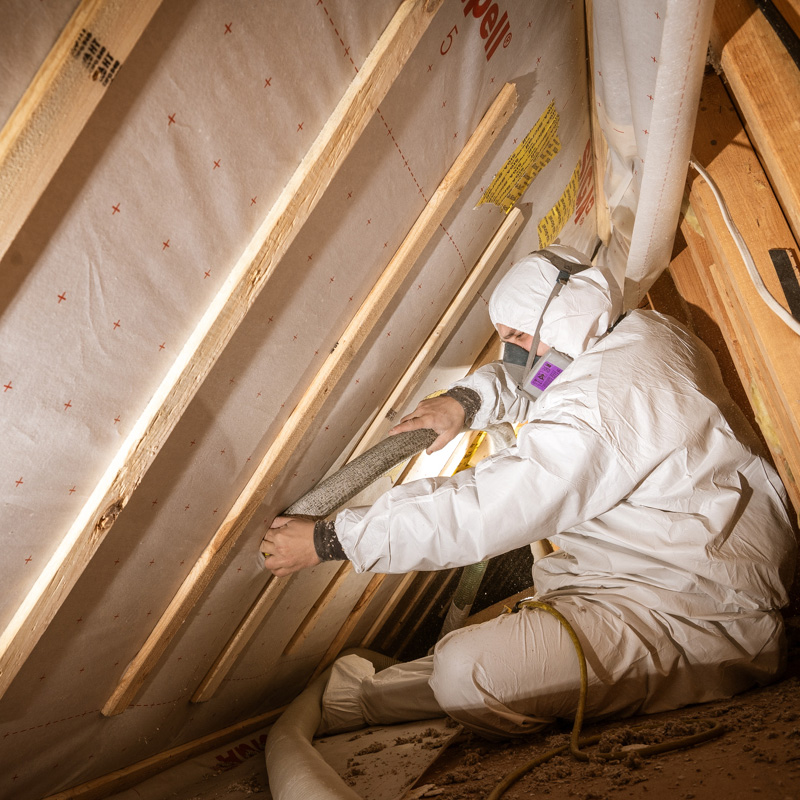
Step 3: Dense-Pack the Cavities
This is the core of the process. Dense-pack cellulose is not the same as loose-fill cellulose blown into an attic. The material is the same - recycled newspaper treated with borate - but the installation density is significantly higher.
Attic loose-fill is installed at roughly 1.5 pounds per cubic foot. It sits loosely on the attic floor and relies on depth for its R-value.
Dense-pack wall fill is installed at 3.5 to 4.0 pounds per cubic foot. At this density, the cellulose becomes a solid, cohesive mass that will not settle over time and provides meaningful air-sealing properties in addition to its thermal resistance.
The Fill Process
- A fill tube (a flexible hose, typically 1 inch in diameter) is inserted through the drilled hole and pushed to the far end of the cavity.
- The blowing machine feeds cellulose through the tube at high pressure.
- As the cavity fills from the far end back toward the hole, the operator feels increasing back-pressure on the tube and gradually withdraws it.
- When the cavity is fully packed, the back-pressure peaks and the operator knows the bay is complete.
- The tube is removed and the process moves to the next stud bay.
An experienced installer can feel when the cavity is properly packed. Under-filling leaves voids that reduce performance. Over-filling can bow drywall or crack plaster. Getting the density right is a skill that comes with hundreds of walls of experience.
R-Value Achieved
Dense-pack cellulose in a 2x4 wall cavity (3.5 inches deep) provides approximately R-13. In a 2x6 wall (5.5 inches deep), it provides approximately R-20. These numbers are below the current code recommendation of R-20 for 2x4 walls and R-23 for 2x6 walls, but they represent a dramatic improvement over empty cavities (R-4 for an uninsulated wall assembly).
In retrofit situations, we are working within the existing framing depth. We cannot change the stud size, so R-13 in a 2x4 wall is the realistic target. It is not R-49 like an attic, but the improvement from R-4 to R-13 is substantial - it triples the thermal resistance of the wall.
Step 4: Plug, Patch, and Restore
After every cavity is filled, the drill holes are plugged with tight-fitting wooden plugs or foam plugs, sealed, and the siding is replaced. For clapboard, we reinstall the removed course and caulk any gaps. For vinyl, the pieces snap back into their original position.
From the outside, the work should be essentially invisible once complete. We take care to match plug colors and maintain clean siding lines. This is not always perfect on older clapboard with peeling paint, but the goal is always to leave the exterior looking as close to its original condition as possible.
If we drilled from the interior, holes are filled with setting compound, sanded smooth, and left ready for the homeowner to prime and paint to match.
Vapor Considerations for Maine Walls
Wall insulation in cold climates requires attention to moisture dynamics. Here is the key principle: in winter, moisture in indoor air wants to migrate outward through the wall assembly toward the cold exterior. If that moisture hits a cold surface and condenses, it can cause rot, mold, and structural damage over time.
The good news about cellulose. Cellulose insulation handles moisture better than most alternatives. It absorbs and releases moisture without losing performance, and the borate treatment provides mold resistance. Dense-packed cellulose also significantly reduces airflow through the wall assembly, which is the primary mechanism for moisture transport in most homes.
Vapor barriers. Many Maine homes built after 1970 have a polyethylene vapor barrier on the interior side of the wall. This is fine for our purposes - it slows moisture migration into the wall cavity. Homes without a vapor barrier (most pre-1960 construction) rely on the "dry wall" principle: the wall assembly can handle some moisture as long as it can dry out seasonally. Dense-pack cellulose supports this drying process better than alternatives like closed-cell spray foam, which traps moisture.
What we watch for. We are cautious about walls with impermeable exterior cladding (like rigid foam sheathing outboard of the wall cavity) combined with an interior vapor barrier. This "double vapor barrier" configuration can trap moisture. These situations require individual evaluation, and sometimes a different approach.
What About Adding Exterior Insulation?
For some homes, particularly deep energy retrofits, adding rigid insulation to the exterior of the building - outboard of the sheathing, under new siding - can dramatically increase wall R-value to R-30 or higher. This is a more involved project than dense-pack alone, and it is typically done when the home needs new siding anyway.
Dense-pack cellulose fills the existing cavities, and rigid foam board on the exterior adds continuous insulation with no thermal bridging through studs. The combination is highly effective, but the cost and scope are significantly larger.
For most Maine homeowners, dense-pack cellulose alone provides the best return on investment. Adding exterior insulation is a conversation for major renovation projects.
Common Situations in Maine Homes
Balloon-framed homes (pre-1930). These homes have wall studs that run continuously from the sill plate to the roof. Without fire stops between floors, the wall cavities act as chimneys - warm air enters at the basement level and exits into the attic. Dense-packing these walls provides insulation and stops this airflow, but the installer must be aware of the continuous cavity and fill it accordingly.
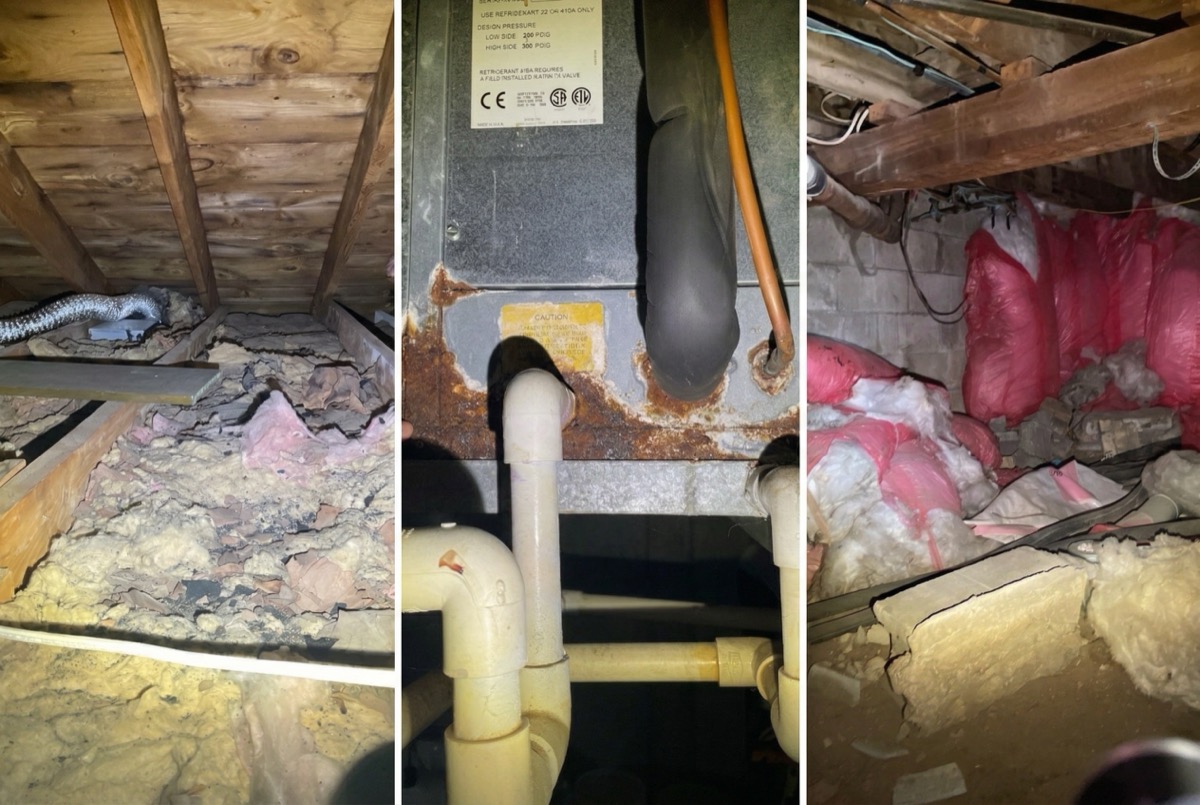
Walls with partial insulation. Some homes have fiberglass batts that have slumped, compressed, or were installed with gaps. In many cases, we can dense-pack cellulose over existing fiberglass if it is dry and in reasonable condition. The cellulose fills around and through the fiberglass, eliminating voids.
Walls with wiring. Electrical wires run through wall cavities, and cellulose packs around them without issue. Dense-pack cellulose does not create heat problems with modern Romex wiring. Active knob-and-tube wiring is a different story - it requires evaluation and typically remediation by an electrician before insulation can be added.
What It Costs
Exterior wall insulation for a typical Maine home (1,200-1,800 square feet of wall area) generally runs $4,000-$8,000 before rebates. Variables include the number of stories, siding type, accessibility, and whether interior drilling is needed.
Efficiency Maine rebates can cover 40-80% of insulation costs, depending on income qualification. Rebate amounts are income-dependent. We handle the full rebate process and deduct the amount from your invoice.
Federal tax credits (25C) provide an additional 30% of costs up to $1,200 per year for insulation work.
For a home with empty 2x4 walls, going from R-4 to R-13 typically reduces heating costs by 15-25%. Combined with attic insulation and air sealing, the overall energy savings reach 30-50%.
How Long the Work Takes
Wall insulation for a typical single-story Maine home takes one day for a two-person crew. A two-story home or a home with complex siding takes 1.5 to 2 days. The work happens entirely from the exterior (in most cases), so there is minimal disruption to daily life inside the home.
Schedule a Free Energy Assessment
Horizon Homes has been insulating Maine walls since 2006. Over 20+ years, we have dense-packed thousands of wall cavities across every type of home in Greater Portland - from 1880's balloon-frame Victorians to 1970's split-levels.
A free home energy assessment is where we start. We will check your walls, measure existing insulation (or confirm the lack of it), evaluate your siding and wall assembly, and give you a clear plan with honest pricing.
Call (207) 221-3221 or schedule your free energy assessment online.
Related Guides
- Attic Floor Insulation Guide for Maine Homes - Start here if your attic is under-insulated
- Basement Wall Insulation Guide for Maine - Complete the thermal envelope below grade
- Rim Joist Insulation Guide for Maine Homes - The connection between walls and foundation
- Knee Wall Insulation for Maine Cape Cods - Walls that live inside your attic
Find our guides faster: add Horizon Homes as a preferred source on Google.
Free Home Energy Assessment
Wondering Where Your Home Is Losing Heat?
We walk through your home, identify insulation gaps and air leaks, and give you a prioritized plan with pricing and Efficiency Maine rebates.
- Free walkthrough, no equipment, no disruption
- Rebates up to $18,100 identified for you
- Written improvement plan with pricing
Schedule Your Free Assessment
We call within 1 business day.