Attic Floor Insulation Guide for Maine Homes
Last Tuesday we pulled ourselves up through the hatch of a 1952 Cape Cod in South Portland. The attic floor had three inches of matted fiberglass draped loosely between the joists. Beside the chimney, a gap the size of a dinner plate opened straight down to the kitchen ceiling below. You could feel the warm air pouring through it from the living space - in a house where the homeowner was burning through 900 gallons of oil per winter.
That scene is not unusual. We see some version of it nearly every week. The attic floor is the single most important surface to insulate in a Maine home, and it is also the surface most likely to be done wrong or not done at all. This guide walks through the complete process - from preparing the attic to verifying the final insulation depth - so you know exactly what proper attic floor insulation looks like and what to expect when the work is done.
Why the Attic Floor Matters More Than Any Other Surface
Heat rises. In a Maine home during January, the warmest air in the house collects at the ceiling level and pushes upward. If the attic floor is poorly insulated or poorly sealed, that heat passes right through and escapes into the attic space and then out the roof.
In a typical under-insulated Maine home, 25-40% of total heat loss occurs through the attic floor. That is more than walls, more than windows, and more than the basement. It is the biggest single source of energy waste, and it is the most cost-effective area to fix.
The attic is also the easiest surface to access for improvement. Unlike walls (which require drilling and patching) or basements (which involve moisture considerations), the attic floor is usually open and accessible once you get past the hatch. The insulation can be blown in on top of existing material without removing anything, as long as the air sealing work is done first.
Step 1: Assess the Current Conditions
Before any insulation goes in, the attic needs a thorough walkthrough. Here is what we check during every attic assessment:
Current insulation depth and type. We measure what is already there. Many Maine homes built in the 1950's through 1970's have 3-6 inches of fiberglass batts, which translates to roughly R-8 to R-19. The current code target for Maine is R-49, which means most older homes are running at a fraction of what they need.
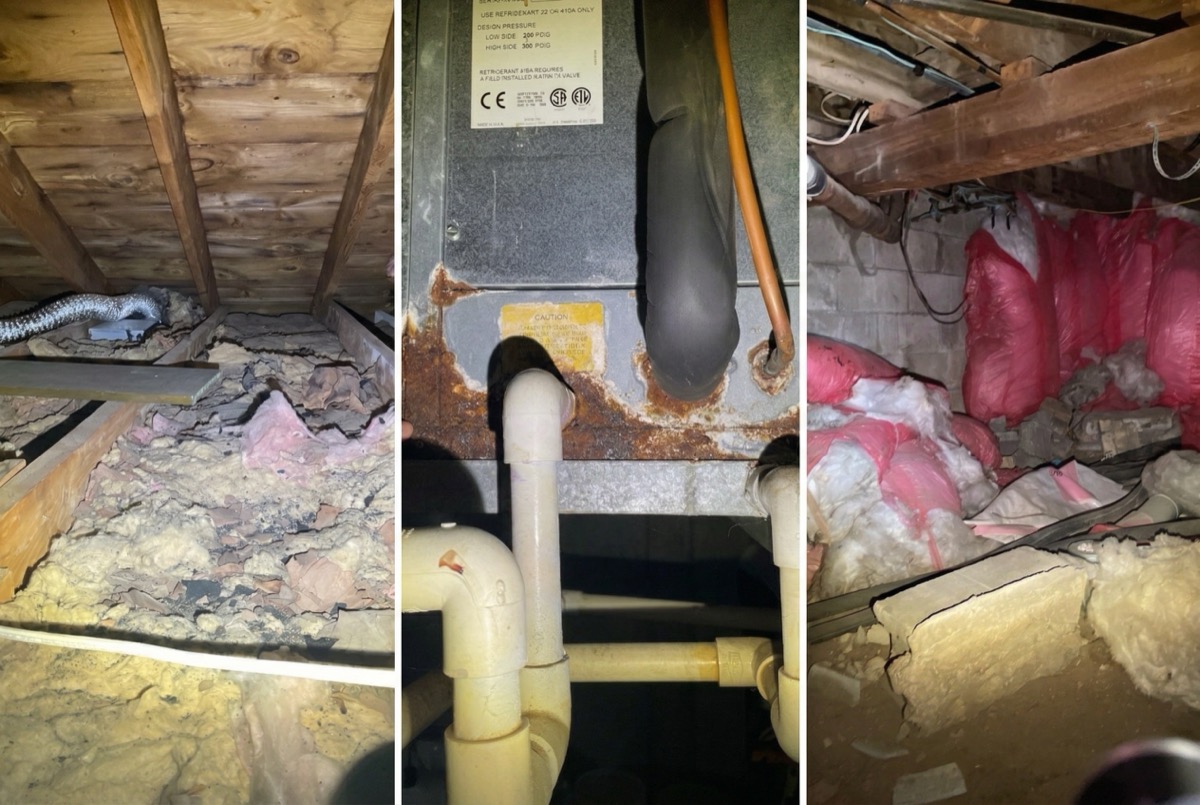
Signs of moisture or damage. Water stains on sheathing, mold on framing, or wet insulation all indicate a moisture problem that must be resolved before adding insulation. Burying a moisture problem under new material makes it worse, not better.
Ventilation pathways. A properly insulated attic still needs ventilation at the eaves and ridge. We check that soffit vents are clear and that there is a path for air to move from soffits to ridge without being blocked by insulation.
Existing air leaks. We look for the telltale signs - dirty insulation (insulation acts as a filter when air moves through it), visible gaps around pipes and wires, open chases, unsealed recessed light housings, and gaps around the chimney.
Knob-and-tube wiring. In pre-1950 Maine homes, we often find active knob-and-tube wiring in the attic. This wiring was designed to dissipate heat into open air, and covering it with insulation creates a fire risk. If knob-and-tube is present and active, it must be addressed by an electrician before insulation work can proceed.
Step 2: Air Seal the Attic Floor
This is the most important step in the entire process. Air sealing the attic floor must happen before any insulation is added. We cannot stress this enough, because this is the step that gets skipped most often - and skipping it cuts the effectiveness of new insulation by 30-50%.
Here is why. Insulation works by trapping still air in small pockets (cellulose fibers, in our case) to slow heat transfer by conduction. But if warm, moist air from the living space can bypass the insulation entirely by flowing through gaps and holes in the attic floor, even R-60 of insulation will not stop that loss. The warm air moves right through the insulation layer by convection, carrying heat with it.
What Gets Sealed
The attic floor has dozens of penetrations and openings that were created during construction and never sealed. Each one is a direct pathway for warm air to escape. Here are the most common ones we address:
- Top plates of interior walls. The top of every interior wall is an open channel that connects the wall cavity to the attic. Warm air rises through these wall cavities and pours into the attic space.
- Plumbing and electrical penetrations. Every pipe, wire, and cable that passes through the attic floor is surrounded by a gap. Individually they seem small. Collectively they can add up to several square feet of open holes.
- Recessed light housings. Older recessed lights (non-IC rated) are basically open holes in the ceiling. We either seal around them with fire-rated materials or, when possible, recommend upgrading to IC-rated LED fixtures that can be safely covered with insulation.
- Dropped soffits and chases. Kitchen soffits, tub/shower surrounds, and HVAC chases create large open cavities that connect the living space to the attic. These are often the biggest single air leaks in the house.
- The attic hatch or pull-down stairs. The access point itself is almost never sealed or insulated. We weatherstrip and insulate the hatch as part of every job.
- Chimney and flue chases. Fire-rated metal flashing and high-temperature caulk are used to seal the gap between the chimney and surrounding framing, while maintaining required clearances.
Materials We Use for Air Sealing
- Canned spray foam for small gaps (around wires, pipes, small penetrations)
- Two-part spray foam kits for medium-sized openings
- Rigid foam board and foil tape for large openings (dropped soffits, open chases)
- Fire-rated caulk and metal flashing for chimney surrounds
- Weatherstripping and rigid foam for the attic hatch
Air sealing is detailed, hands-and-knees work. On a typical Maine home, it takes 4-8 hours to properly air seal an attic floor. It is not glamorous, but it is the work that delivers the biggest return.
Step 3: Install Ventilation Baffles
Before blowing in cellulose, we install rigid ventilation baffles (also called rafter vents or proper-vents) at every rafter bay along the eaves. These baffles create a channel that keeps the soffit-to-ridge airflow path open even after insulation is blown to full depth.
Without baffles, loose-fill insulation would block the soffit vents, cutting off ventilation. Poor attic ventilation leads to moisture buildup in winter and excessive heat in summer, both of which shorten roof life and can cause structural damage.
The baffles extend from the top plate of the exterior wall up the rafter bay, past the insulation line. This keeps the insulation from spilling over and blocking the vent openings while maintaining a minimum 1-inch air channel between the insulation and the roof sheathing.
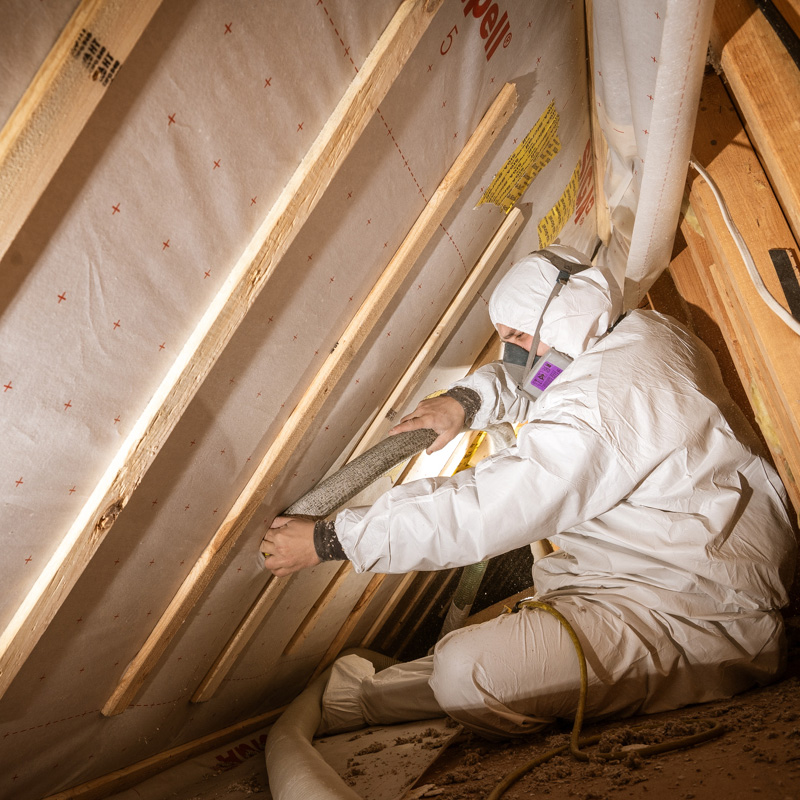
Step 4: Blow Cellulose Insulation to R-50
With air sealing complete and baffles in place, we bring in the blowing machine and hose. We use blown-in cellulose insulation for attic floors, and it is the right material for this application for several reasons:
- Performance. Cellulose provides R-3.5 to R-3.8 per inch, and it fills around obstacles (wires, pipes, framing irregularities) completely. No gaps, no voids, no compression.
- Composition. 85% recycled newspaper treated with borate for fire resistance and pest deterrence. Class 1 fire rating. Zero off-gassing.
- Cost. 40-70% less expensive than spray foam for the same R-value in an open attic floor application. Spray foam is simply not needed here - the attic floor is already air sealed, and cellulose does the thermal job extremely well.
- Longevity. 30+ year lifespan with minimal settling when installed at proper density.
Target Depth
To reach R-50 with cellulose, we blow to approximately 14-15 inches of settled depth. We install depth markers (rulers stuck vertically into the insulation at regular intervals) so the homeowner and any future contractor can verify the depth without guessing.
The blowing process itself takes 2-4 hours for a typical Maine home attic. We start at the far end of the attic and work back toward the hatch, maintaining consistent depth throughout. The hose operator controls the density and depth while a second crew member monitors from the hatch area.
Step 5: Insulate and Seal the Attic Hatch
The attic hatch is the weak link that gets forgotten on too many jobs. An uninsulated, unsealed hatch in an otherwise well-insulated attic is like leaving a window open - it creates a concentrated pathway for heat loss.
We attach rigid foam insulation (minimum R-15) to the attic side of the hatch, install compression weatherstripping around the frame, and add hook-and-eye latches or clips to hold the hatch snug against the weatherstripping. For pull-down stairs, we use insulated attic stair covers that create a sealed enclosure over the folding staircase.
Common Obstacles in Maine Attics
Every attic is different, and older Maine homes present specific challenges that are worth understanding before work begins.
Low clearance. Many Maine Capes and story-and-a-half homes have attic spaces where the roof pitch drops to just a few inches above the attic floor at the eaves. Getting insulation and air sealing materials into these tight spaces requires patience and the right equipment. It slows the work down but does not change the approach.
Vermiculite insulation. Some homes built in the 1940's through the 1970's have vermiculite insulation in the attic. Vermiculite from the Libby, Montana mine (which accounted for the majority of US supply) may contain asbestos. If we encounter vermiculite, we stop work and recommend testing before proceeding.
HVAC equipment in the attic. Ductwork, air handlers, and other mechanical equipment in the attic create obstacles and additional air sealing targets. We insulate and seal around this equipment, but it does increase the scope and cost of the project.
Previous insulation. In most cases, existing insulation can stay in place. We blow the new cellulose right on top of old fiberglass batts or existing loose-fill. The exception is if the old insulation is wet, moldy, or contaminated - then it needs to be removed first.
What It Costs
Attic floor insulation for a typical Maine home (1,000-1,500 square foot attic floor) generally runs $3,000-$6,000 before rebates, depending on the amount of air sealing needed, the accessibility of the attic, and any obstacle removal or preparation required.
Efficiency Maine rebates can cover 40-80% of the cost, depending on income qualification. The rebate amounts are income-dependent, so the exact figure varies by household. We handle the entire rebate application process and apply the amount directly to your invoice - no waiting for reimbursement checks.
Federal tax credits (25C) allow an additional deduction of 30% of costs up to $1,200 per year for insulation and air sealing work.
For a typical project, homeowners can expect to reduce their heating costs by 20-30% from attic work alone. In a home burning 800-1,000 gallons of oil per year, that translates to roughly $600-$1,000 in annual savings at current fuel prices.
How Long the Work Takes
A typical attic floor insulation project - including air sealing, baffle installation, and cellulose blowing - takes one full day for a crew of two. Larger homes, complex attic layouts, or extensive air sealing needs may extend into a second day.
The work is done entirely from inside the attic. There is no disruption to the living space below beyond some noise from the blowing machine (which sits outside or in the garage) and a hose that runs through the house to the attic access.
Schedule a Free Energy Assessment
Horizon Homes has been insulating Maine attics since 2006. With 20+ years of experience and thousands of attic projects completed across Greater Portland, we know what we are going to find when we open that hatch - and we know exactly how to fix it.
A free home energy assessment is the first step. We will walk through your home, check your current insulation levels, identify air leakage points, and give you a clear plan with transparent pricing.
Call (207) 221-3221 or schedule your free energy assessment online.
Related Guides
- Air Sealing Your Maine Home - The companion to attic insulation
- Knee Wall Insulation for Maine Cape Cods - The tricky space connected to your attic
- Exterior Wall Insulation for Maine Homes - The next surface to address after the attic
- Cathedral Ceiling Insulation Options for Maine - When the ceiling follows the roofline
Find our guides faster: add Horizon Homes as a preferred source on Google.
Free Home Energy Assessment
Wondering Where Your Home Is Losing Heat?
We walk through your home, identify insulation gaps and air leaks, and give you a prioritized plan with pricing and Efficiency Maine rebates.
- Free walkthrough, no equipment, no disruption
- Rebates up to $18,100 identified for you
- Written improvement plan with pricing
Schedule Your Free Assessment
We call within 1 business day.