Rim Joist Insulation Guide for Maine Homes
If your first floor runs cold and your basement is unfinished, the instinct is to insulate the basement ceiling. That is rarely the right first move. Walk the perimeter of your basement at ceiling height and look at the rim joist area, where the floor framing sits on top of the foundation wall. On most Maine homes, you will find visible gaps between the joist ends and the rim board. We can feel the draft from three feet away on cold days. Cold air moves freely through those gaps into the joist cavities, which connect directly to the exterior walls above.
The rim joist is one of the most significant sources of air leakage and heat loss in a typical Maine home, and one of the most overlooked. It is a relatively small area (the total rim joist surface in a typical home is only 100-200 square feet), but its impact on comfort and energy use is disproportionately large because of how much air moves through it.
What Is the Rim Joist
The rim joist (also called the band joist or box sill) is the structural perimeter of the floor framing system. Picture the foundation wall. Sitting on top of it is the sill plate (a horizontal board bolted to the top of the concrete). Standing on the sill plate are the floor joists that support the first floor. The rim joist is the vertical board that caps the ends of those floor joists around the entire perimeter of the house.
In cross-section, the assembly looks like this from bottom to top:
- Foundation wall (concrete or stone)
- Sill plate (typically a 2x6 or 2x8 lying flat)
- Rim joist (a board the same depth as the floor joists, standing vertically)
- Subfloor (plywood or boards) sitting on top of the joists
Every connection point in this assembly is a potential air leak. The sill plate-to-foundation joint, the rim joist-to-sill plate joint, the joist ends where they meet the rim board, and any penetrations for pipes, wires, or vents that pass through the rim joist to the exterior.
Why the Rim Joist Matters So Much
The rim joist area accounts for a surprising amount of total air leakage in a Maine home - typically 15-25% of the total envelope leakage measured by a blower door test. There are several reasons for this:
Many individual leak points. A home with 40 floor joists has 40 joist bays at the rim joist, each with its own gaps and cracks. Add the sill plate connection, pipe and wire penetrations, and the connection to the subfloor above, and you have dozens of individual air leakage paths concentrated in a small area.
Stack effect amplification. In winter, warm air rising through the house (the stack effect) exits through the upper levels - the attic, upper walls, and upper-story rim joists. As this warm air leaves, it pulls cold air into the lower levels of the house, entering through the basement rim joist, sill plate, and any other low openings. The rim joist is both an exit point for warm air at upper floors and an entry point for cold air at the basement level.
Direct connection to wall cavities. The joist bays at the rim joist connect directly to the wall cavities above. Cold air entering through a leaky rim joist travels upward through the wall cavity, cooling the wall and eventually reaching the attic. This air movement through walls - invisible and unfelt by the homeowner - is a major contributor to the cold exterior walls and high heating bills that many Maine homeowners experience.
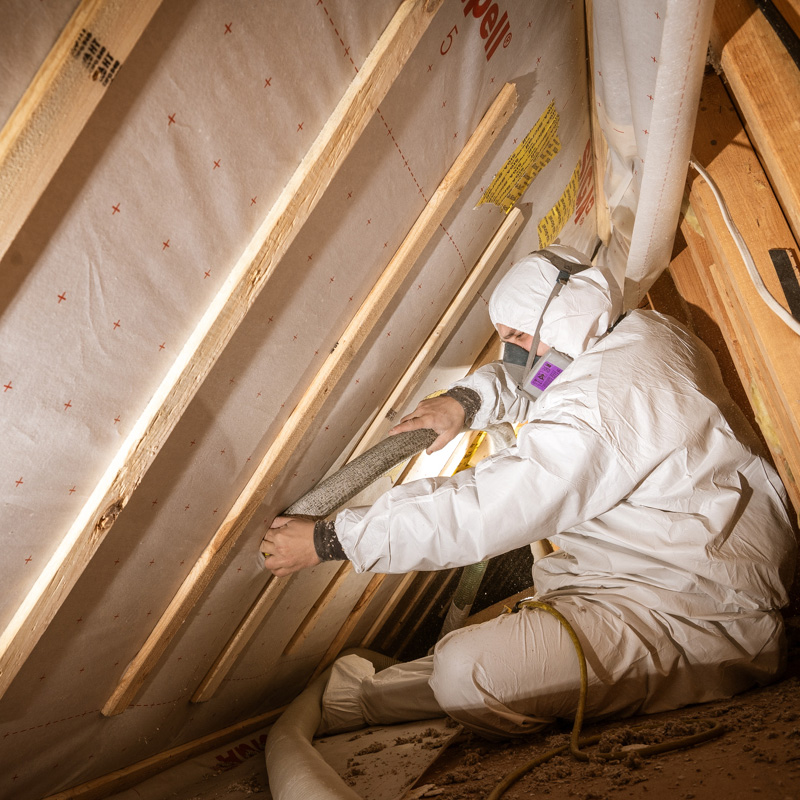
Step 1: Assess the Rim Joist Area
The assessment is done from the basement, looking up at the rim joist from below. Here is what we evaluate:
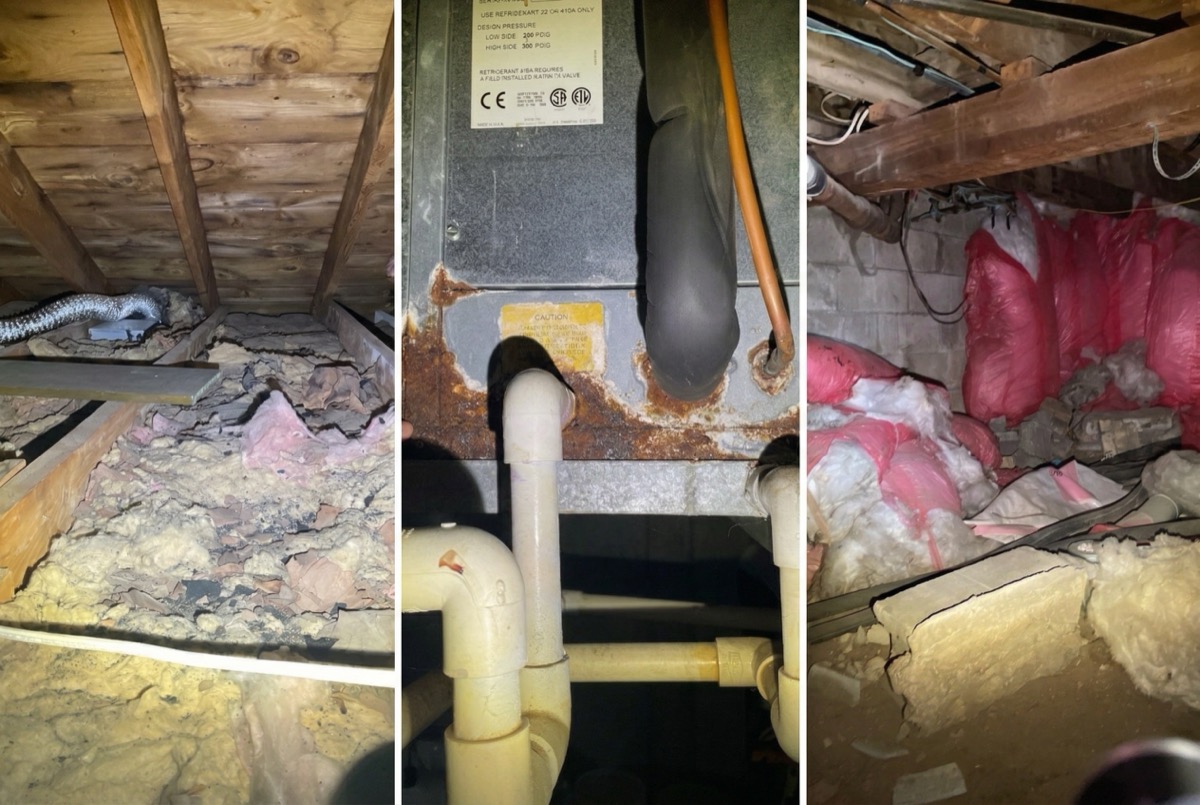
Current insulation. Many Maine homes have fiberglass batts stuffed into the joist bays at the rim joist. These are better than nothing but provide limited performance because they do not stop air movement. Some homes have no insulation at the rim joist at all.
Visible air leaks. On a cold, windy day, air movement at the rim joist is often visible as dust movement or felt as a draft. We check for gaps at the sill plate, between joist ends and the rim board, and around any penetrations.
Moisture conditions. The rim joist is a cold surface in winter, and condensation can form when warm, moist basement air contacts it. We check for signs of moisture damage, mold, or wood rot at the rim joist and sill plate. These must be addressed before insulating.
Accessibility. Most rim joists are accessible from the basement, but obstacles like ductwork, pipes, wires, and low clearance can complicate access in specific areas.
Penetrations. Water supply lines, drain pipes, electrical conduit, gas lines, exterior faucet connections, dryer vents, and exhaust fan ducts all pass through the rim joist area. Each is an air leak and each must be sealed.
Step 2: Choose the Insulation Method
Method A: Spray Foam (Subcontracted - Preferred)
Closed-cell spray foam applied directly to the rim joist is the most effective approach for this area. It seals air leaks and insulates in a single application, conforming to every gap, crack, and irregularity in the wood framing.
Why spray foam is preferred for rim joists:
- Conforms to irregular surfaces and fills all gaps completely
- Provides air sealing and insulation simultaneously
- Adheres directly to wood and concrete surfaces
- Does not sag or fall out over time
- Provides a vapor barrier that prevents condensation on cold rim joist surfaces
The process:
- Remove any existing fiberglass batts from the joist bays.
- Our subcontracted spray foam specialists apply 2-3 inches of closed-cell spray foam to the rim joist, sill plate, and the top of the foundation wall in each joist bay.
- The foam covers the rim board, the ends of the joists, the sill plate, and the concrete-to-sill joint, creating a continuous insulated and sealed envelope around the entire perimeter.
- After the foam cures (typically 24 hours for full cure, but tack-free within minutes), the area can be left exposed or covered with drywall if the basement is being finished.
R-value achieved: 2 inches of closed-cell spray foam provides approximately R-13. 3 inches provides approximately R-20.
Cost: Spray foam rim joist insulation for a typical Maine home runs $1,500-$3,500, depending on the perimeter length and accessibility.
Method B: Cut-and-Cobble (DIY-Friendly Alternative)
For homeowners on a tighter budget or for situations where spray foam contractors are not available, the cut-and-cobble method provides good results with readily available materials.
The process:
- Measure each joist bay at the rim joist. Bay widths vary, so each piece must be measured and cut individually.
- Cut rigid foam board (polyiso or XPS, 1.5 to 2 inches thick) to fit snugly in each joist bay, leaving about a quarter-inch gap around all edges.
- Press the foam piece into the joist bay against the rim board.
- Seal all edges with canned spray foam, filling the quarter-inch gap between the rigid foam and the framing. This spray foam seal is critical - it is the air sealing component.
- Repeat for every joist bay around the entire perimeter.
R-value achieved: 2 inches of polyiso provides approximately R-13. The spray foam edge seal adds a small additional R-value and provides the air barrier.
Advantages: Lower cost than spray foam, can be done in stages, uses off-the-shelf materials.
Limitations: Much more labor-intensive (a typical home has 40-60 joist bays to cut and seal individually), quality depends heavily on how well each piece is sealed, does not conform to irregular surfaces as well as spray foam.
Step 3: Seal Penetrations
Every pipe, wire, duct, and conduit that passes through the rim joist must be individually sealed. This is true regardless of whether the main insulation method is spray foam or cut-and-cobble.
For spray foam installations, the spray foam applicator seals most penetrations as part of the foam application. For cut-and-cobble, each penetration is sealed with canned spray foam or fire-rated caulk (for combustible appliance venting).
Common penetrations that need sealing:
- Water supply lines (typically copper or PEX)
- Drain/waste/vent pipes
- Electrical conduit and individual wire runs
- Gas lines
- Dryer vent ducts
- Bathroom and kitchen exhaust vent ducts
- Exterior hose bibb connections
- Radon mitigation piping (if present)
Step 4: Address the Sill Plate Connection
The connection between the sill plate and the top of the foundation wall is a continuous linear air leak that runs the entire perimeter of the house. In older homes, this joint was typically not sealed at all - the sill plate was simply laid on top of the concrete.
Spray foam applied to the rim joist area covers this joint automatically. For cut-and-cobble installations, we apply a continuous bead of caulk or spray foam along the sill plate-to-concrete joint before installing the rigid foam pieces in the joist bays.
In some older homes, the sill plate-to-foundation gap is large enough to feel a draft through it. Backer rod (foam rope) pushed into the gap before caulking helps fill larger openings.
Connection to Air Sealing
The rim joist is inseparable from the overall air sealing strategy for a home. Insulating the rim joist without sealing it is significantly less effective than a combined approach. Conversely, air sealing the rim joist without insulating it still leaves a thermal weak point.
For a complete air sealing overview - including all the areas we seal beyond the rim joist - see our Air Sealing Guide.
What It Costs
- Spray foam (subcontracted): $1,500-$3,500 for a typical Maine home
- Cut-and-cobble (materials): $300-$800 in materials, plus significant labor time
Rim joist insulation is often done as part of a larger basement or whole-house insulation project. Efficiency Maine rebates cover 40-80% of insulation costs for qualifying homeowners. Rebate amounts are income-dependent. We handle the full rebate process and deduct the amount from your invoice.
Federal tax credits (25C) provide 30% of costs up to $1,200 per year for insulation work.
The energy impact of rim joist insulation is disproportionate to the area involved. Sealing and insulating the rim joist typically reduces overall air leakage by 10-20% (as measured by blower door test) and can reduce heating costs by 5-15%.
Schedule a Free Energy Assessment
Horizon Homes has been insulating and sealing rim joists in Maine homes since 2006. With 20+ years of experience in Greater Portland, we can evaluate your rim joist area, recommend the right approach, and coordinate the work - including subcontracted spray foam - as part of a comprehensive insulation plan.
A free home energy assessment includes a thorough evaluation of your basement and rim joist area. We will check for air leaks, assess moisture conditions, and show you exactly where the heat is leaving your home.
Call (207) 221-3221 or schedule your free energy assessment online.
Related Guides
- Basement Wall Insulation Guide for Maine - Complete the foundation insulation
- Air Sealing Your Maine Home - The full air sealing picture
- Exterior Wall Insulation for Maine Homes - The walls above the rim joist
- Insulating Floors Over Unconditioned Spaces - When the floor above needs insulation
Find our guides faster: add Horizon Homes as a preferred source on Google.
Free Home Energy Assessment
Wondering Where Your Home Is Losing Heat?
We walk through your home, identify insulation gaps and air leaks, and give you a prioritized plan with pricing and Efficiency Maine rebates.
- Free walkthrough, no equipment, no disruption
- Rebates up to $18,100 identified for you
- Written improvement plan with pricing
Schedule Your Free Assessment
We call within 1 business day.