Knee Wall Insulation for Maine Cape Cods
We pulled open the knee wall access door in a 1962 Cape Cod in Westbrook and pointed our flashlight into the triangular attic space behind it. The fiberglass batts between the studs of the knee wall were visible from the attic side - exposed, unfaced, with daylight gaps at the top and bottom. A steady current of cold air was flowing up from the floor cavity below, across the face of the batts, and up through the rafters toward the ridge.
The homeowner had told us the upstairs bedrooms were always the coldest rooms in the house, even with the thermostat set to 70. He had added weatherstripping to the windows, replaced the window panes, and put a space heater in the kids' room. None of it made a meaningful difference, because the problem was not the windows. The problem was behind the knee walls.
Knee walls are the short walls that separate the finished rooms on the upper floor of a Cape Cod or story-and-a-half home from the unfinished triangular attic spaces on either side. They are among the most commonly botched insulation details in Maine homes, and fixing them properly can transform the comfort and energy performance of an entire floor.
What Is a Knee Wall and Why Does It Fail
A knee wall is typically 3-5 feet tall, running along the length of the upstairs rooms in a Cape Cod or gambrel-style home. On the room side, it looks like a normal wall - drywall, maybe with a closet built into it. On the other side, there is an unfinished triangular attic space with the underside of the roof above and the floor joists of the room below.
The problem is that these knee wall attic spaces are essentially outdoors. They are usually vented to the exterior through soffit vents, and in winter they run at close to outdoor temperature. The knee wall separates your heated bedroom from this near-outdoor space, but it almost never has adequate insulation or air sealing.
Why Standard Knee Wall Insulation Fails
The traditional approach - fiberglass batts friction-fit between the knee wall studs - fails for three specific reasons:
No air barrier. Fiberglass batts are not an air barrier. Without a solid, continuous backing on the cold side of the insulation, air moves freely through and around the batts. In winter, cold air from the knee wall attic washes across the face of the fiberglass, dramatically reducing its effective R-value. Wind washing, as this is called, can cut the performance of fiberglass batts by 50% or more.
No floor insulation. The floor of the knee wall attic is also the ceiling of the room below, extending from the knee wall to the eave. This floor section is typically uninsulated and unsealed, allowing heat from the room below to pour upward into the cold attic space.
No ceiling connection. The slope of the roof above the knee wall - the rafter space that runs from the knee wall top plate up to the ridge or flat ceiling - is often poorly insulated or not insulated at all. Heat escaping from the room rises into this rafter space and exits through the ridge.
The result is that the knee wall attic acts as a massive heat sink, pulling warmth from the room through the wall, floor, and ceiling simultaneously. Fixing just one surface is not enough. All three surfaces of the knee wall attic must be addressed.
Step 1: Air Seal the Knee Wall Attic Floor
The floor of the knee wall attic is the most overlooked surface. It is the ceiling of the room below the knee wall, extending outward from the base of the knee wall to the eave. This floor has all the same penetrations and leakage paths as any attic floor - top plates of walls below, wiring holes, pipe penetrations, and the joist cavities themselves.
Air sealing tasks:
- Seal the top plates of any interior walls that run perpendicular to the knee wall (these wall cavities are open channels for air movement)
- Seal wiring and plumbing penetrations through the subfloor
- Seal any open joist bays that connect to the interior wall cavities below
- Install blocking at the joist bays along the base of the knee wall to prevent air movement between the floor cavities and the knee wall attic
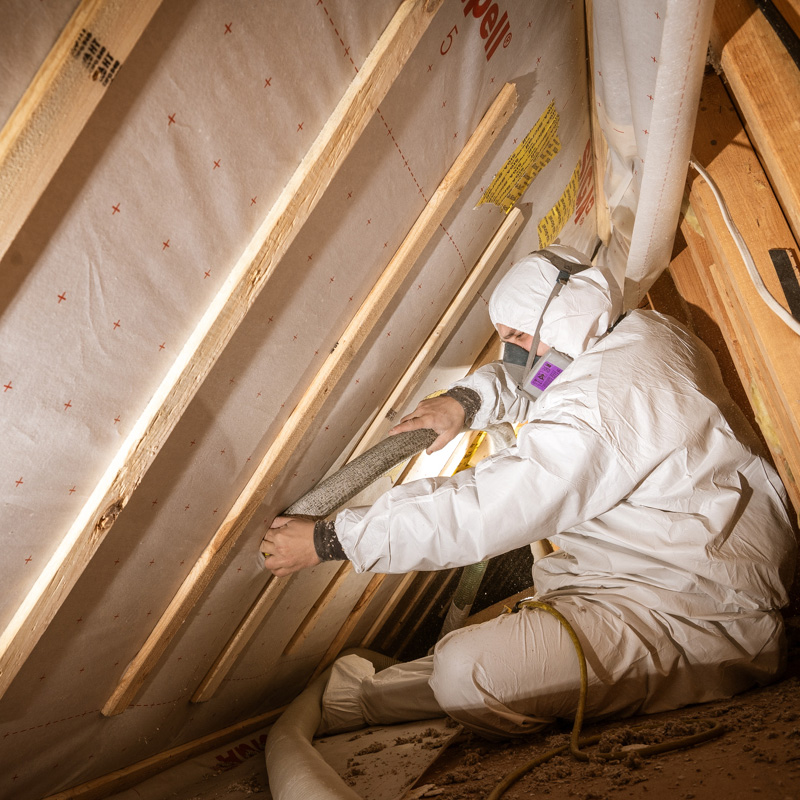
This air sealing work happens from inside the knee wall attic space, on hands and knees, with caulk, canned spray foam, and rigid foam board for blocking. It is the same meticulous work as sealing any attic floor, just in a much tighter space.
Step 2: Insulate the Knee Wall Attic Floor
After air sealing, we blow cellulose insulation over the knee wall attic floor to the same R-49 target as any other attic floor. In the tight triangular space near the eaves, where clearance drops to inches, we use the blowing hose to push cellulose as far toward the eave as possible while maintaining the ventilation path at the soffit.
Ventilation baffles at each rafter bay keep the soffit-to-ridge airflow path clear and prevent cellulose from blocking the vents.
Step 3: Install an Air Barrier on the Attic Side of the Knee Wall
This is the step that transforms knee wall performance. Instead of relying on fiberglass batts alone (which do not stop air movement), we install a rigid air barrier on the cold (attic) side of the knee wall before insulating the stud cavities.
Materials
- Rigid foam board (typically 1 inch of polyiso or XPS) sealed at all edges with caulk and tape
- Or housewrap-type material stapled to the studs and sealed at all edges and seams
Installation
- Working from inside the knee wall attic, we attach the air barrier material to the attic-side face of the knee wall studs.
- Every seam, edge, and penetration is sealed with compatible tape or caulk.
- The air barrier extends from the knee wall floor to the top plate, creating a continuous wind barrier across the entire knee wall surface.
- The bottom of the air barrier connects to the floor air sealing work, and the top connects to the rafter insulation above.
The air barrier stops wind washing. Cold air in the knee wall attic can no longer flow across the face of the insulation in the stud cavities. This single step can double the effective R-value of the knee wall assembly.
Step 4: Dense-Pack the Knee Wall Stud Cavities
With the air barrier in place on the cold side, we dense-pack cellulose into the knee wall stud cavities. The installation can happen from the attic side (through holes in the new air barrier, sealed afterward) or from the room side (through the drywall, patched afterward).
Dense-pack cellulose at 3.5-4.0 pounds per cubic foot fills the cavity completely, eliminates voids, and provides its own secondary air-sealing benefit within the wall. In a 2x4 knee wall (3.5 inches deep), this provides approximately R-13. In a 2x6 knee wall (5.5 inches deep), approximately R-20.
Step 5: Address the Rafter Slope Above the Knee Wall
The rafter bays that run from the top of the knee wall up to the flat ceiling above (or to the ridge, in the case of a cathedral ceiling section) must also be insulated. This is the pathway for heat to escape upward from the room through the ceiling plane.
If there is a flat ceiling above the upstairs rooms with an accessible attic above, this area gets treated as part of the main attic insulation - air seal and blow cellulose to R-49.
If the rafter slope connects directly to a cathedral ceiling, then the approaches described in our Cathedral Ceiling Insulation Guide apply - dense-pack with ventilation baffles, spray foam (subcontracted), or a hybrid approach depending on rafter depth.
Step 6: Insulate and Seal the Access Door
Every knee wall attic has an access point - a door, hatch, or panel. These access points are almost never insulated or sealed. We treat them the same way we treat attic hatches: rigid foam insulation on the attic side, compression weatherstripping around the frame, and latches to hold the door snug against the seal.
A poorly sealed knee wall access door in an otherwise well-insulated knee wall assembly is like leaving a window open in a well-insulated room. It defeats the purpose of the surrounding work.
The Complete Knee Wall Assembly
When all steps are complete, the insulated knee wall assembly looks like this (from room side to attic side):
- Drywall (room side)
- Dense-pack cellulose in stud cavities
- Rigid air barrier (attic side)
- Knee wall attic space (cold side)
And the knee wall attic floor:
- Subfloor/ceiling of room below
- Air sealed penetrations
- Blown cellulose to R-49 depth
This complete approach treats the knee wall attic the same way we treat any attic - as an unconditioned space that is thoroughly air sealed and insulated on all surfaces that face heated living space.
Common Situations in Maine Cape Cods
Built-in storage and closets. Many Cape Cods have closets or built-in storage tucked into the knee wall space. These areas must be included in the insulation and air sealing scope. The back wall of a knee wall closet is effectively a knee wall, and it needs the same treatment.
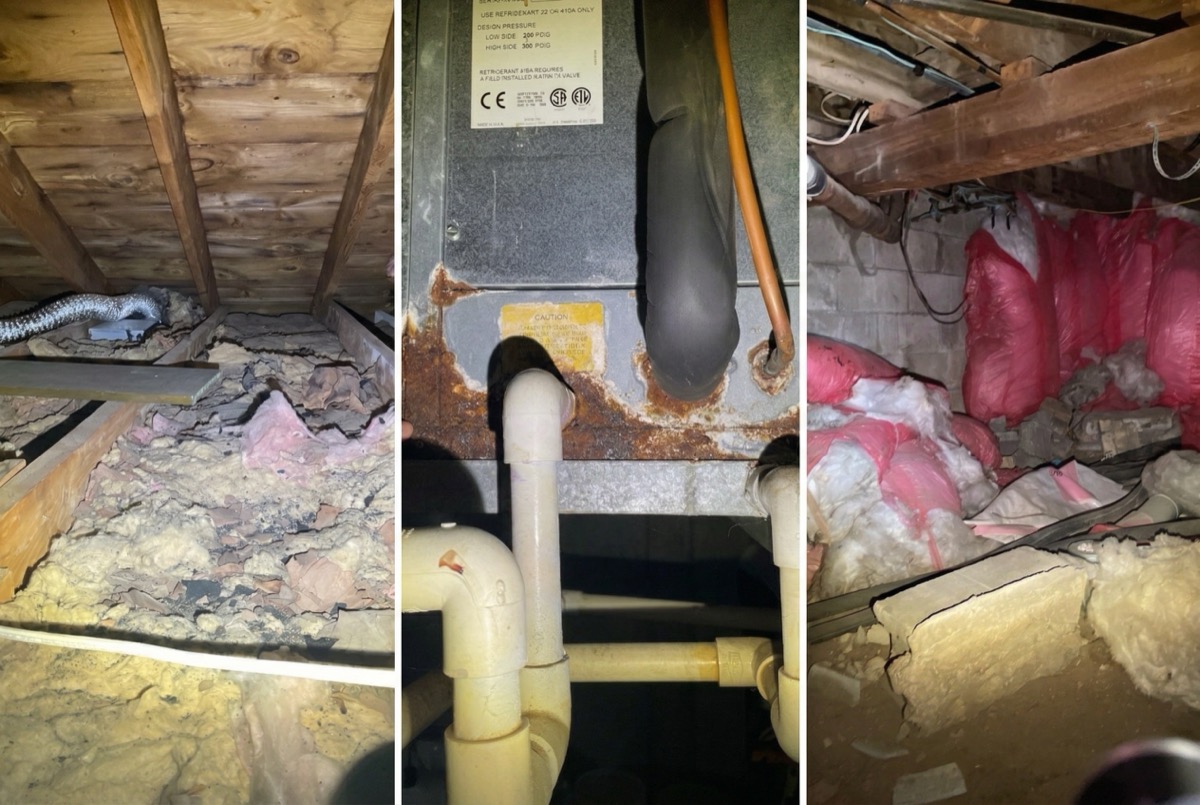
Ductwork in the knee wall attic. Heating ducts running through the knee wall attic space lose tremendous amounts of heat to the cold attic air. Ideally, ducts should be rerouted inside the conditioned space. If that is not practical, they must be thoroughly insulated and sealed.
Multiple knee wall sections. A Cape Cod may have knee wall attics on both sides of the upstairs, plus a flat attic above, plus cathedral ceiling sections. All of these surfaces must be addressed as a connected system. Insulating the knee walls without addressing the attic above leaves a major gap.
What It Costs
Complete knee wall insulation and air sealing for a typical Maine Cape Cod (both sides, floor, walls, access doors) generally runs $4,000-$8,000 before rebates. This is typically done as part of a larger project that includes the main attic and possibly the cathedral ceiling sections.
Efficiency Maine rebates cover 40-80% of insulation costs for qualifying homeowners. Rebate amounts are income-dependent. We handle the entire rebate process and deduct the amount from your invoice.
The comfort improvement from properly insulating knee walls is often the most dramatic of any insulation project. Homeowners who have lived with cold upstairs bedrooms for years are consistently surprised at how different the rooms feel after the knee walls, floors, and rafter slopes are properly sealed and insulated.
Schedule a Free Energy Assessment
Horizon Homes has been fixing knee wall insulation in Maine Cape Cods since 2006. With 20+ years of experience in Greater Portland, we know the specific patterns and problems that Cape Cod homes present, and we know how to solve them systematically.
A free home energy assessment is the first step. We will check your knee wall attic spaces, assess the current insulation and air sealing, and give you a clear plan to make your upstairs rooms comfortable year-round.
Call (207) 221-3221 or schedule your free energy assessment online.
Related Guides
- Cathedral Ceiling Insulation Options for Maine - The rafter slope above the knee wall
- Attic Floor Insulation Guide for Maine Homes - The flat attic above your Cape Cod
- Insulating Bonus Rooms Over Garages in Maine - Another multi-surface challenge
- Air Sealing Your Maine Home - The foundation of every insulation project
Find our guides faster: add Horizon Homes as a preferred source on Google.
Free Home Energy Assessment
Wondering Where Your Home Is Losing Heat?
We walk through your home, identify insulation gaps and air leaks, and give you a prioritized plan with pricing and Efficiency Maine rebates.
- Free walkthrough, no equipment, no disruption
- Rebates up to $18,100 identified for you
- Written improvement plan with pricing
Schedule Your Free Assessment
We call within 1 business day.