Insulating Flat and Low-Slope Roofs in Maine
Here is a fact that surprises most homeowners: flat roofs are not actually flat. Every properly built flat roof in Maine has a slight slope - typically a quarter inch per foot or more - to drain water toward scuppers, gutters, or internal drains. The roofing industry calls them "low-slope" roofs, defined as anything with a pitch below 2:12.
The reason this matters for insulation is that low-slope roofs create a completely different insulation challenge than steep-slope roofs. There is no attic space to blow insulation into. Ventilation works differently (and sometimes not at all). Moisture management becomes more critical because water moves slower across the surface and has more opportunity to find its way in. And ice dams - already a major problem in Maine - behave differently on flat roofs than on pitched ones.
Portland, South Portland, and the surrounding communities have thousands of flat-roofed buildings, from multi-family homes and mixed-use buildings on the peninsula to ranch-style additions and sunrooms on suburban houses. Many of these roofs are poorly insulated or not insulated at all. This guide covers the approaches for getting them right.
Why Flat Roofs Are Different
No Attic Buffer
A steep-slope roof with an attic gives you a buffer zone between the heated space and the outdoors. You insulate the attic floor, and the attic itself serves as a ventilated air space that moderates temperature extremes.
A flat roof eliminates that buffer. The roof deck is right above the ceiling of the room below, with only the joist cavity between them. Heat loss through the roof is direct, and any insulation deficiency translates immediately into comfort problems and energy waste.
Ventilation Limitations
Steep-slope roofs ventilate through soffit-to-ridge airflow driven by natural convection. Flat roofs cannot rely on this mechanism because the minimal slope generates almost no convective airflow. Some flat roof designs include ventilation channels, but many - especially older ones - are completely unventilated assemblies.
This matters because moisture that enters the roof assembly (from interior air leakage or diffusion) has limited ability to dry out in an unventilated flat roof. The insulation strategy must account for this by managing where moisture can enter and where it can exit.
Ice Dam Behavior
On a pitched roof, ice dams form at the eaves when heat escaping through the roof melts snow on the upper slope. On a flat or low-slope roof, the problem is different. Because the entire roof surface is close to the same temperature, ice and water buildup can occur anywhere - at drains, at edges, at scuppers, and in low spots. Ponding water that freezes and thaws repeatedly accelerates membrane degradation and increases leak risk.
Proper insulation reduces heat loss through the roof deck, keeping the surface cold and reducing the melt-freeze cycles that cause damage.
Approach A: Above-Deck Rigid Foam (During Re-Roofing)
This is the most effective approach for insulating a flat roof, and it is most practical when the roof needs replacement anyway. Adding insulation above the deck during re-roofing delivers the best thermal performance, eliminates thermal bridging through the joists, and does not reduce the ceiling height of the room below.
Step 1: Strip the Old Roof
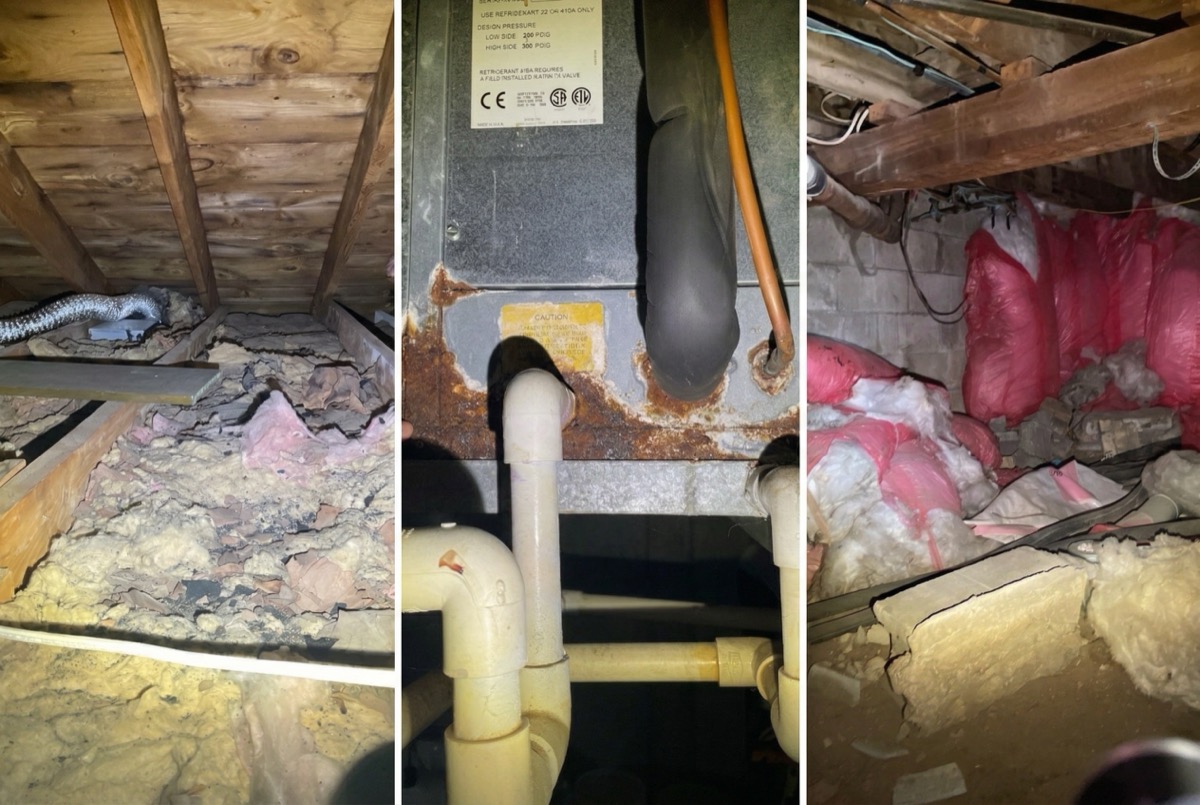
Remove the existing membrane and any deteriorated insulation down to the structural deck (plywood, OSB, or board sheathing). Inspect the deck for damage and replace any compromised sections.
Step 2: Install a Vapor Retarder
On the cleaned structural deck, install a vapor retarder (self-adhered membrane or polyethylene sheet) to prevent interior moisture from migrating upward into the insulation assembly. The vapor retarder goes on the warm side of the insulation - directly on top of the structural deck.
Step 3: Install Rigid Foam Insulation
Layer rigid foam board (polyiso is the most common choice for flat roofs due to its high R-value per inch) on top of the vapor retarder. Typical installations use 3-6 inches of polyiso, providing R-18 to R-39.
For Maine's climate, we target a minimum of R-30 for flat roofs, with R-40 or higher preferred. The foam layers are staggered so that the seams of one layer do not align with the seams of the layer below, creating a continuous thermal barrier.
Step 4: Install Cover Board
A protective cover board (typically half-inch fiber board or gypsum) goes on top of the foam insulation to protect it from damage during membrane installation and to provide a stable substrate for the roofing membrane.
Step 5: Install the New Roof Membrane
The new roofing membrane (EPDM rubber, TPO, or modified bitumen) is installed over the cover board using the manufacturer's specified attachment method. The membrane extends over the parapet walls and is terminated with metal flashing.
Step 6: Slope to Drain
If the existing roof does not have adequate slope for drainage, tapered insulation boards (rigid foam cut at a slight wedge) can create the necessary slope to direct water toward drains or scuppers. This dual-purpose material insulates and provides drainage simultaneously.
R-Value Achieved
- 3 inches of polyiso: approximately R-18
- 4 inches: approximately R-26
- 6 inches: approximately R-39
Cost
Above-deck rigid foam insulation adds $3,000-$8,000 to a flat roof replacement project, depending on roof area and target R-value. Since the roofing work is happening regardless, the incremental cost of adding insulation is significantly lower than doing a standalone insulation project.
Approach B: Dense-Pack Cellulose from Below
When the roof is not due for replacement and above-deck insulation is not practical, the alternative is to insulate from below by dense-packing cellulose into the joist cavities between the ceiling and the roof deck.
Step 1: Assess the Joist Cavity
Determine the joist depth (which limits insulation thickness), check for existing insulation, and evaluate ventilation status. Flat roof joist cavities range from 2x6 (5.5 inches) to 2x12 (11.25 inches) or deeper in some constructions.
Step 2: Determine Ventilation Approach
If the flat roof assembly includes a ventilation channel above the insulation (between the insulation and the roof deck), we maintain it. If the assembly is unventilated by design, we install as an unventilated assembly and ensure proper vapor management.
For unventilated flat roof assemblies, building science requires that the insulation be in direct contact with the roof deck and that interior air and moisture be prevented from reaching the cold deck surface. Dense-pack cellulose at 3.5-4.0 pounds per cubic foot provides meaningful air resistance, but in flat roof applications, we pay close attention to vapor management at the ceiling plane.
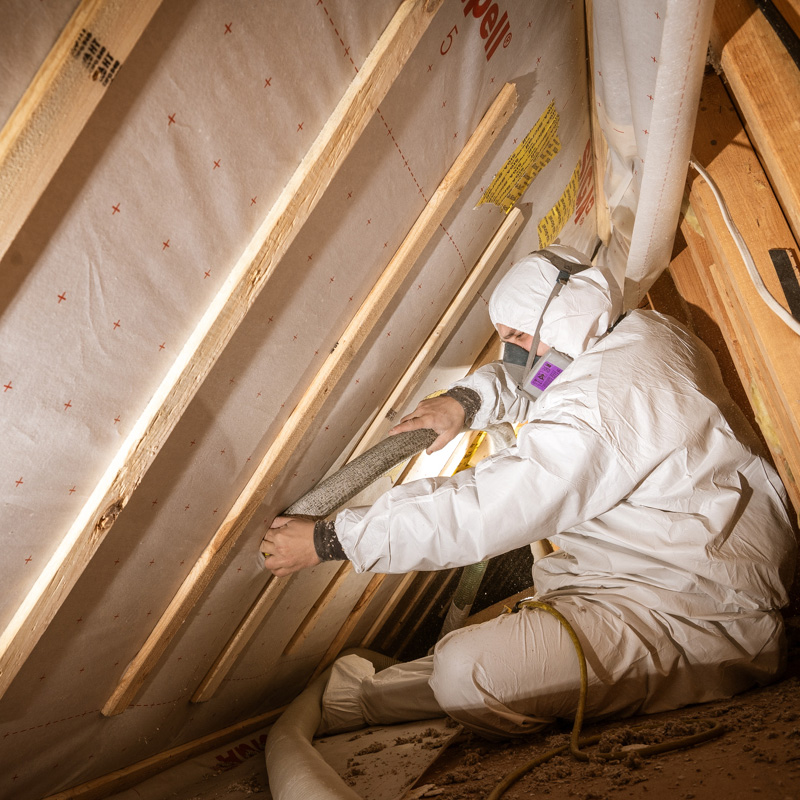
Step 3: Dense-Pack Through the Ceiling
Small holes (2 to 2.5 inches) are drilled through the ceiling surface (drywall, plaster, or wood) at each joist bay. A fill tube is inserted and cellulose is dense-packed to the specified density, filling the cavity from one end to the other.
The holes are plugged, patched with setting compound, sanded, and left ready for paint.
Step 4: Air Seal the Ceiling Plane
Air sealing is critical for flat roof assemblies, especially unventilated ones. Any penetrations through the ceiling - light fixtures, electrical boxes, plumbing vents, and the patched fill holes themselves - are sealed with caulk or canned spray foam to prevent warm, moist interior air from reaching the cold roof deck.
R-Value Achieved
- 2x6 joists (5.5 inches): approximately R-20
- 2x8 joists (7.25 inches): approximately R-26
- 2x10 joists (9.25 inches): approximately R-33
- 2x12 joists (11.25 inches): approximately R-41
Cost
Dense-pack cellulose from below for a typical flat roof section runs $2,000-$5,000, depending on area, joist depth, and accessibility.
Approach C: Combined Above and Below
For maximum performance, rigid foam above the deck (during re-roofing) can be combined with dense-pack cellulose in the joist cavities below. This delivers the highest total R-value and eliminates thermal bridging while filling the cavity completely.
This approach is most practical when a re-roofing project coincides with an interior insulation project. Combined R-values of R-50 or higher are achievable.
Moisture Management Is Critical
Flat roof insulation demands careful attention to moisture. The key principles:
Prevent interior moisture from entering the assembly. Air seal the ceiling plane thoroughly. In above-deck installations, install a vapor retarder on the warm side of the insulation.
Allow drying where possible. Avoid trapping moisture between two impermeable layers. Above-deck polyiso with a membrane above and a vapor retarder below creates a "sandwich" that cannot dry in either direction - the assembly must be built dry and kept dry.
Monitor for leaks. Any roof leak that introduces water into an insulated flat roof assembly will cause problems faster than in an uninsulated assembly, because the insulation prevents drying. Regular roof maintenance and prompt leak repair are essential.
What It Costs
- Above-deck during re-roofing: $3,000-$8,000 (incremental to roofing cost)
- Dense-pack from below: $2,000-$5,000
- Combined approach: $5,000-$12,000
Efficiency Maine rebates cover 40-80% of insulation costs for qualifying homeowners. Rebate amounts are income-dependent. We handle the rebate process and deduct the amount from your invoice.
Federal tax credits (25C) provide 30% of costs up to $1,200 per year for insulation work.
Schedule a Free Energy Assessment
Horizon Homes has been insulating flat roofs and low-slope assemblies across Greater Portland since 2006. With 20+ years of experience, we understand the specific moisture and thermal dynamics that flat roofs demand, and we will recommend the approach that fits your situation and timeline.
A free home energy assessment is the first step. We will evaluate your flat roof from inside (ceiling condition, joist depth, current insulation) and from outside (membrane condition, drainage, remaining roof life) to determine the right path forward.
Call (207) 221-3221 or schedule your free energy assessment online.
Related Guides
- Cathedral Ceiling Insulation Options for Maine - Similar depth constraints with different solutions
- Attic Floor Insulation Guide for Maine Homes - For the steep-slope sections of your roof
- Insulating Bonus Rooms Over Garages in Maine - Another challenging roof/ceiling assembly
- Insulating the Garage Ceiling in Maine Homes - Flat ceiling insulation over unconditioned space
Find our guides faster: add Horizon Homes as a preferred source on Google.
Free Home Energy Assessment
Wondering Where Your Home Is Losing Heat?
We walk through your home, identify insulation gaps and air leaks, and give you a prioritized plan with pricing and Efficiency Maine rebates.
- Free walkthrough, no equipment, no disruption
- Rebates up to $18,100 identified for you
- Written improvement plan with pricing
Schedule Your Free Assessment
We call within 1 business day.