Insulating the Garage Ceiling in Maine Homes
The complaint always starts the same way. "That room above the garage is freezing." The homeowner points at the ceiling. "I have tried everything - space heater, extra vent from the furnace, even an electric blanket. Nothing works. My kid refuses to sleep up there from December through March."
We hear this more often than almost any other comfort complaint in Greater Portland. Rooms above garages are notorious for being cold, and the garage ceiling - the floor of that room - is the primary reason. It is a horizontal surface separating a heated room from an unheated, often uninsulated garage that sits at close to outdoor temperature for most of the winter.
This guide covers the step-by-step process for insulating a garage ceiling properly, including the fire safety considerations that make this area different from any other ceiling in the house.
Why Garage Ceilings Are Different
A garage ceiling that has living space above it functions like an attic floor - it separates heated space from unheated space. But it presents several challenges that a standard attic floor does not:
The garage is very cold. Unlike an enclosed basement that stays in the 40's and 50's due to ground temperature, an attached garage with a large door opening regularly drops to near-outdoor temperature. When it is 5 degrees outside, it may be 10-15 degrees in the garage. The temperature differential across the garage ceiling can be 55-60 degrees.
Cars bring in moisture. A car driven into the garage on a winter day carries snow, ice, and road salt that melt and evaporate, raising the humidity in the garage. This moisture rises and can condense on cold surfaces in the ceiling assembly if not managed properly.
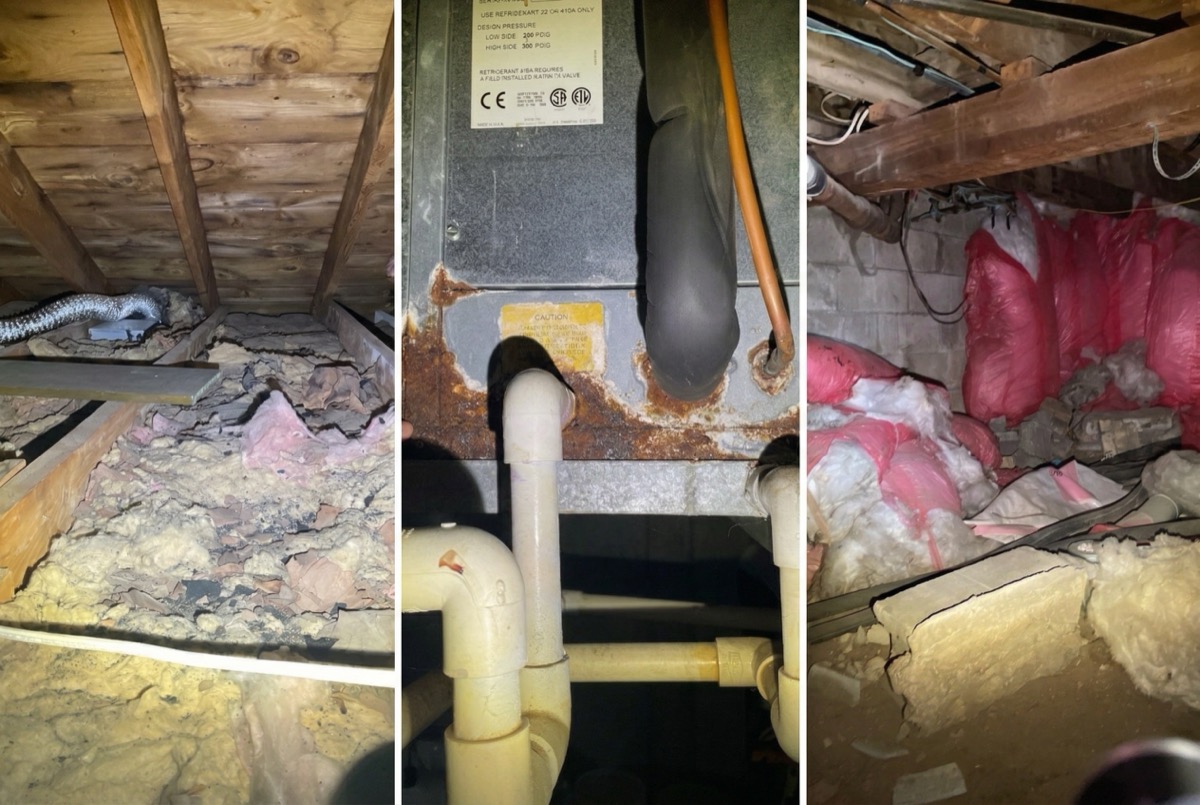
Penetrations are common. Electrical wires, plumbing (for a bathroom above), HVAC ducts, and the garage door opener mechanism all pass through the garage ceiling, creating air leak pathways.
Fire code requirements apply. The garage ceiling serves as a fire separation between the garage (where flammable liquids, gas appliances, and vehicles are stored) and the living space above. Building codes require specific fire-rated assemblies for this separation, and insulation work must not compromise the fire rating.
Step 1: Understand Fire Code Requirements
Before any insulation work begins in a garage ceiling, the fire separation must be assessed and maintained.
Drywall requirement. Building codes generally require a minimum of 5/8-inch Type X (fire-rated) drywall on the garage side of any ceiling or wall that separates the garage from living space. This requirement applies to the entire ceiling, all common walls, and any door openings between the garage and the house.
What this means for insulation work. If the existing garage ceiling has proper fire-rated drywall, insulation can be blown into the joist cavities from above (if accessible from the room above or an adjacent attic space) or through holes drilled through the drywall (which must be patched with fire-rated compound afterward). If the existing drywall is not fire-rated, or if there is no drywall on the garage ceiling at all, that deficiency should be corrected as part of the project.
Penetration sealing. Any penetrations through the garage ceiling - pipes, wires, ducts - must be sealed with fire-rated materials. Standard caulk and spray foam are not fire-rated. We use fire-rated caulk and intumescent sealant at these locations.
Step 2: Air Seal Penetrations
Air sealing the garage ceiling is critical for two reasons: energy performance and indoor air quality. Garage air contains vehicle exhaust, gasoline vapors, and other contaminants that should not enter the living space. Air sealing prevents both heat loss and pollutant transfer.
Key Air Sealing Targets
Electrical penetrations. Wiring for the garage door opener, light circuits, and outlets passes through the ceiling at multiple points. Each penetration is sealed with fire-rated caulk.
Plumbing penetrations. If a bathroom sits above the garage, drain and supply pipes pass through the ceiling. These are sealed with fire-rated sealant, maintaining clearance requirements for hot pipes.
HVAC connections. Heating ducts or registers that serve the room above may pass through the garage ceiling. The connections between ductwork and ceiling penetrations are sealed with mastic and fire-rated materials.
The garage door opener. The motor housing and track brackets are typically bolted through the ceiling. The bolt holes and any gaps around the mounting hardware are sealed.
Recessed lights. If the garage has recessed light fixtures in the ceiling, these are significant air leak points. Non-IC-rated fixtures must have fire-rated covers installed above them before insulation can be placed over them.
Common wall connection. Where the garage ceiling meets the house wall, gaps often exist at the top plate. These are sealed with caulk and, where gaps are large, with rigid foam and fire-rated sealant.
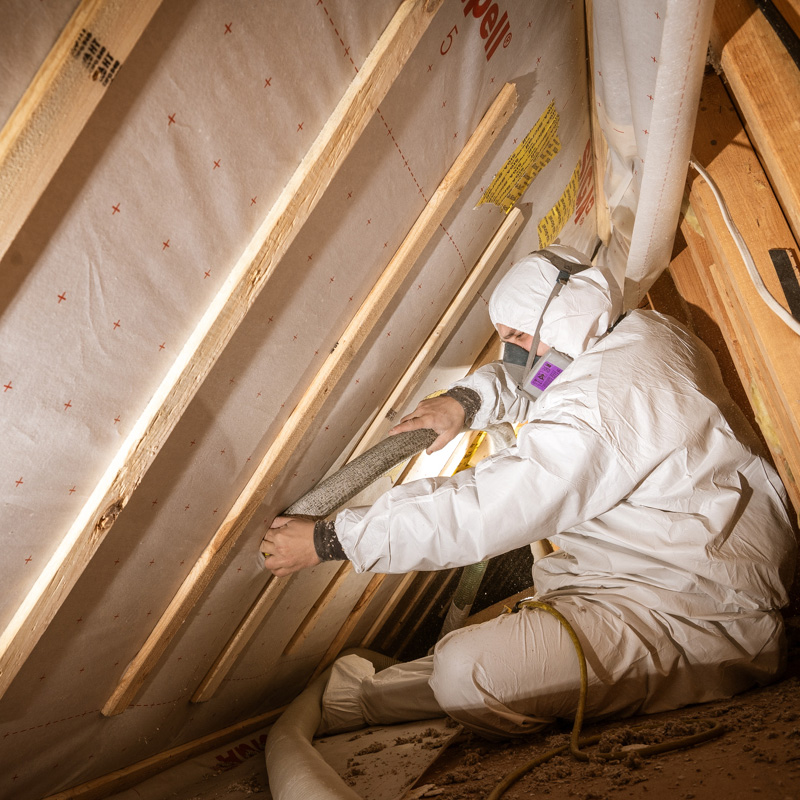
Step 3: Blow Cellulose Insulation
With air sealing complete and fire code compliance verified, we blow cellulose insulation into the joist cavities of the garage ceiling.
Access Points
From above. If the room above has a subfloor that can be partially removed (such as in an unfinished bonus room) or if adjacent attic space connects to the garage ceiling joist bays, we can blow cellulose from above. This is the preferred access method because it allows visual confirmation that the cavities are fully filled.
From below through the drywall. When access from above is not available, we drill fill holes through the garage ceiling drywall, insert the fill tube, and blow each joist bay to density. The holes are then patched with fire-rated drywall compound and tape.
Insulation Depth and R-Value
Garage ceiling joists are typically 2x8, 2x10, or 2x12, providing:
| Joist Size | Cavity Depth | R-Value (Cellulose) |
|---|---|---|
| 2x8 | 7.25 inches | R-26 |
| 2x10 | 9.25 inches | R-33 |
| 2x12 | 11.25 inches | R-41 |
We fill the entire cavity depth with cellulose at standard loose-fill density (1.5 pounds per cubic foot) when filling from above, or at dense-pack density (3.5-4.0 pounds per cubic foot) when filling through holes from below.
The target is to fill the cavity completely with no gaps or voids. Any section of joist bay that is left unfilled creates a cold spot on the floor above.
Step 4: Insulate the Garage Walls (If Not Already Done)
The garage ceiling insulation is only as effective as the garage's overall thermal envelope. If the garage walls adjacent to the room above (including the wall between the garage and the house, and any exterior walls of the garage) are uninsulated, cold air in the garage will still cool the floor above - just less directly.
For attached garages where the room above extends over the garage, insulating the exterior garage walls reduces the temperature differential across the ceiling and improves the performance of the ceiling insulation.
We use the same dense-pack cellulose approach for garage walls as for any exterior wall - drill from the exterior through the siding, dense-pack the cavities, and plug the holes.
Step 5: Seal and Insulate the Garage Door (If Desired)
The garage door is the single largest opening in the garage envelope. An uninsulated steel garage door has an R-value of less than 1. Insulated garage doors (with polystyrene or polyurethane core) range from R-6 to R-18.
Replacing or insulating the garage door is not required for the ceiling insulation project to be effective, but it does help maintain a higher garage temperature in winter, reducing the load on the ceiling insulation.
Weatherstripping the garage door - bottom seal, side seals, and top seal - also reduces cold air infiltration into the garage.
Connection to Bonus Room Insulation
If the room above the garage is a bonus room (with knee walls, sloped ceilings, or both), the garage ceiling insulation is just one piece of a larger puzzle. The bonus room may need insulation on five different surfaces - the floor (garage ceiling), the knee walls, the sloped ceiling, the flat ceiling above, and the gable end walls.
Our Bonus Room Insulation Guide covers the complete multi-surface approach for these rooms. The garage ceiling work described here is often performed as part of that larger project.
What It Costs
Garage ceiling insulation for a typical two-car garage (approximately 400-500 square feet of ceiling area) generally runs $2,000-$4,500 before rebates, depending on joist depth, accessibility, extent of air sealing needed, and fire code compliance work.
Efficiency Maine rebates cover 40-80% of insulation costs for qualifying homeowners. Rebate amounts are income-dependent. We handle the entire rebate process and deduct the amount from your invoice.
Federal tax credits (25C) provide 30% of costs up to $1,200 per year for insulation work.
The comfort improvement from properly insulating a garage ceiling is often immediate and dramatic. Homeowners report that the room above goes from "unusable in winter" to comfortable within a day of the work being completed.
Schedule a Free Energy Assessment
Horizon Homes has been insulating garage ceilings and bonus rooms in Maine homes since 2006. With 20+ years of experience across Greater Portland, we understand the fire code requirements, the air sealing priorities, and the insulation methods that make these challenging areas perform.
A free home energy assessment includes evaluation of your garage ceiling, the room above it, and how they connect to the rest of your home's thermal envelope.
Call (207) 221-3221 or schedule your free energy assessment online.
Related Guides
- Insulating Bonus Rooms Over Garages in Maine - The complete multi-surface approach
- Insulating Floors Over Unconditioned Spaces - Other floor-over-cold situations
- Attic Floor Insulation Guide for Maine Homes - Same principles, different location
- Rim Joist Insulation Guide for Maine Homes - Sealing the perimeter connection
Find our guides faster: add Horizon Homes as a preferred source on Google.
Free Home Energy Assessment
Wondering Where Your Home Is Losing Heat?
We walk through your home, identify insulation gaps and air leaks, and give you a prioritized plan with pricing and Efficiency Maine rebates.
- Free walkthrough, no equipment, no disruption
- Rebates up to $18,100 identified for you
- Written improvement plan with pricing
Schedule Your Free Assessment
We call within 1 business day.